Why I Love This Recipe
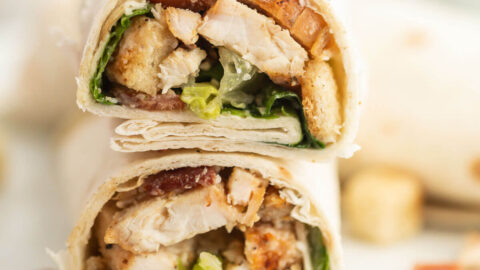
This Grilled Chicken Caesar Wrap is the perfect combination of smoky grilled chicken, crisp romaine lettuce, crunchy croutons, and creamy Caesar dressing—all wrapped up in a soft flour tortilla. It’s quick to prepare, loaded with flavor, and versatile enough for lunch, dinner, or even meal prep. The addition of bacon and Parmesan cheese takes it to the next level, making it a favorite for the whole family. Whether you’re enjoying it fresh off the grill or packing it for a picnic, this recipe never disappoints!
Grilled Chicken Caesar Wrap Recipe
Prep Time: 10 minutes
Cook Time: 12 minutes
Total Time: 22 minutes
Servings: 4
Ingredients
For the Chicken:
- 2 boneless, skinless chicken breasts (approximately 1 pound)
- ¼ tsp salt
- ¼ tsp black pepper
- ¼ tsp garlic powder
For the Wraps:
- 2 cups romaine lettuce, shredded
- 4 slices of bacon, cooked and chopped
- ¼ cup Parmesan cheese, grated
- ¼ cup croutons
- ½ cup Caesar dressing
- 4 flour tortillas (8-inch size)
Instructions
Step 1: Prepare the Grill
- Preheat your grill to medium-high heat (about 400°F).
- Lightly grease the grill grates with oil to prevent sticking.
Step 2: Season and Cook the Chicken
- Season both sides of the chicken breasts with salt, pepper, and garlic powder.
- Place the chicken breasts directly onto the grill grates. Cook for 6-7 minutes per side, or until the internal temperature reaches 165°F.
- Remove the chicken from the grill and let it rest for 5 minutes to retain its juices.
- Once rested, slice the chicken into thin strips.
Step 3: Assemble the Filling
- In a large mixing bowl, combine the sliced chicken, shredded romaine lettuce, chopped bacon, grated Parmesan cheese, and croutons.
- Drizzle the Caesar dressing over the mixture. Toss gently until all the ingredients are evenly coated.
Step 4: Assemble the Wraps
- Lay out the flour tortillas on a flat surface.
- Spoon the chicken Caesar mixture onto the center of each tortilla, dividing it evenly among the four wraps.
- Tightly fold the sides of each tortilla inward, then roll it up to secure the filling.
Step 5: Serve and Enjoy
- Cut each wrap in half for easier handling.
- Serve immediately and enjoy the fresh, flavorful wraps!
Tips & Tricks
- Grill Marks Matter: To get those beautiful grill marks on your chicken, avoid moving it too often while it’s cooking.
- Warm Tortillas: For easier wrapping, microwave the tortillas for 10-15 seconds to make them pliable.
- Customize the Filling: Add sliced avocado, cherry tomatoes, or a sprinkle of fresh herbs like parsley for extra flavor.
FAQs
1. Can I use store-bought rotisserie chicken?
Absolutely! If you’re short on time, shred or slice rotisserie chicken and skip the grilling step.
2. What if I don’t have a grill?
You can cook the chicken in a skillet or grill pan over medium-high heat for the same amount of time, or until the internal temperature reaches 165°F.
3. Can I make these wraps ahead of time?
These wraps are best served fresh. However, you can prepare the filling in advance and store it in an airtight container in the fridge. Assemble the wraps just before serving to prevent them from becoming soggy.
4. What’s a good substitute for Caesar dressing?
You can use a Greek yogurt-based dressing or make your own by blending mayonnaise, Parmesan cheese, lemon juice, anchovies, garlic, and olive oil.
Storage & Reheating
- Refrigerator: Store leftover filling ingredients separately in airtight containers for up to 3 days.
- Freezer: This recipe is not ideal for freezing, as the lettuce and dressing may lose their texture and flavor.
- Reheating: Reheat the chicken gently in a microwave or skillet if needed, and assemble the wraps fresh.
This Grilled Chicken Caesar Wrap is a delicious, quick meal that’s perfect for any occasion. Whether you’re feeding the family or packing lunch for work, it’s guaranteed to be a crowd-pleaser. Pair it with a side of fresh fruit or a simple green salad for a complete, satisfying meal
