Making bread in an air fryer is a simple and rewarding way to enjoy fresh homemade bread without needing a large oven. Because an air fryer functions like a compact convection oven, it circulates hot air rapidly around the dough, creating a beautifully golden crust while keeping the inside soft, fluffy, and tender.
Air fryer bread is perfect for small households, beginners learning bread baking, or anyone who wants fresh bread without heating an entire kitchen. With just a few pantry staples and some basic techniques, you can create flavorful homemade bread with excellent texture and aroma.
This complete guide explains not only how to make air fryer bread, but also why each ingredient and technique matters. Understanding the process helps improve consistency and baking confidence.
Why Make Bread in an Air Fryer?
Air fryers are surprisingly effective for bread baking because they maintain steady circulating heat in a compact space.
Benefits of Air Fryer Bread
- Faster preheating than conventional ovens
- Crispy golden crust
- Soft interior texture
- Ideal for small batches
- Energy efficient
- Great for beginners
- Minimal kitchen heat during warm weather
Because the baking chamber is smaller, bread often cooks more quickly and evenly than expected.
Understanding Bread Ingredients
Bread may appear simple, but each ingredient plays an important role in structure, texture, flavor, and rise.
Core Ingredients
1. Flour
Flour forms the foundation of the dough.
Recommended:
- All-purpose flour for soft, beginner-friendly bread
- Bread flour for chewier texture and stronger gluten development
Flour contains proteins that form gluten when mixed with water and kneaded.
Gluten gives bread:
- Structure
- Elasticity
- Chewiness
- Ability to trap gas from yeast
Whole Wheat Flour
Whole wheat flour can replace part of the white flour, but it absorbs more water and creates denser bread.
For best texture:
- Replace only 25–50% initially
2. Yeast
Yeast is a living microorganism responsible for fermentation.
As yeast feeds on sugars in the dough, it produces:
- Carbon dioxide gas
- Flavor compounds
The trapped gas causes the dough to rise.
Common Types
Instant Yeast
- Mixed directly into flour
- Faster and easier
Active Dry Yeast
- Usually dissolved in warm water first
- Slightly slower activation
3. Water
Water hydrates the flour and activates yeast activity.
Ideal Temperature
Warm water is essential.
Best range:
- 40–45°C
- 105–113°F
If Water Is:
- Too cold → slow rising
- Too hot → kills yeast
4. Sugar
Sugar supports yeast fermentation and improves flavor.
Benefits include:
- Faster rising
- Better browning
- Slight sweetness
Only a small amount is needed.
5. Salt
Salt is critical for balanced flavor and dough strength.
It:
- Enhances taste
- Regulates yeast activity
- Strengthens gluten structure
Too much salt may slow yeast activity significantly.
6. Fat (Butter or Oil)
Fat softens bread texture and improves shelf life.
Benefits:
- Softer crumb
- Richer flavor
- Better moisture retention
Butter adds flavor while oil creates a softer texture.
7. Milk (Optional)
Milk enriches the dough and creates softer bread.
It also helps:
- Browning
- Tender texture
- Flavor development
Air Fryer Bread Recipe
Preparation Time
15 minutes
Rising Time
1.5–2 hours
Cooking Time
20–25 minutes
Total Time
Approximately 2 hours 30 minutes
Ingredients
- 2 cups all-purpose flour
- 1 teaspoon instant yeast
- ¾ cup warm water
- 1 tablespoon sugar
- 1 teaspoon salt
- 1 tablespoon oil or melted butter
Optional
- 2 tablespoons milk
- Herbs
- Garlic powder
- Cheese
Step 1: Activate the Yeast (Optional)
If using active dry yeast:
- Pour warm water into a bowl
- Stir in sugar
- Sprinkle yeast on top
- Let sit for 5–10 minutes
Signs Yeast Is Active
- Foamy surface
- Bubbling
- Yeasty aroma
If no foam appears, the yeast may be expired or the water temperature may be incorrect.
Instant yeast can be added directly to flour.
Step 2: Mix the Dough
In a large bowl:
- Combine flour and salt
- Add yeast mixture or instant yeast
- Add oil or butter
- Mix until a rough dough forms
The dough will initially appear:
- Sticky
- Rough
- Uneven
This is normal.
Step 3: Knead the Dough
Kneading develops gluten, which gives bread structure and elasticity.
How to Knead
- Place dough on a lightly floured surface
- Push forward with the heel of your hand
- Fold dough back over itself
- Rotate slightly
- Repeat for 8–10 minutes
How to Know Kneading Is Complete
The dough should become:
- Smooth
- Elastic
- Slightly springy
Windowpane Test
Stretch a small piece of dough gently.
If it stretches thin without tearing, gluten development is sufficient.
If it tears easily, continue kneading.
Step 4: First Rise (Bulk Fermentation)
Place dough into a lightly oiled bowl.
Cover with:
- Plastic wrap
- Kitchen towel
Allow dough to rise in a warm area for:
- 1–1.5 hours
The dough should approximately double in size.
What Happens During Rising?
Yeast ferments sugars and releases carbon dioxide.
This process:
- Expands the dough
- Improves flavor
- Creates air pockets
Longer fermentation usually improves taste.
Step 5: Shape the Dough
Once risen:
- Gently press down the dough
- Shape into a loaf or round ball
Why Degassing Matters
Pressing the dough:
- Removes oversized air pockets
- Redistributes yeast
- Improves texture consistency
Shaping Methods
Round Loaf
Pull dough edges inward and tighten the surface.
Oval Loaf
Roll dough into a cylinder shape.
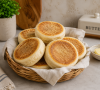
Rolls or Buns
Divide into equal portions and roll individually.
Surface tension helps bread rise upward instead of spreading outward.
Step 6: Second Rise (Proofing)
Place shaped dough into:
- Greased pan
- Air fryer-safe baking dish
Cover lightly and let rise again for:
- 20–30 minutes
This final proof creates:
- Lighter texture
- Better crumb
- Improved oven spring
Skipping this step often results in dense bread.
Step 7: Prepare the Air Fryer
Important Notes
Air fryers vary in size and power.
Before Baking:
- Preheat to 160°C (320°F)
- Preheat for 3–5 minutes
- Use a pan that allows airflow around it
Avoid overcrowding the basket.
Step 8: Bake the Bread
Initial Baking Stage
Bake at:
- 160°C (320°F)
- 15 minutes
This stage allows the bread interior to cook gradually.
Final Browning Stage
Increase temperature to:
- 180°C (350°F)
Bake an additional:
- 5–10 minutes
This develops:
- Golden crust
- Crisp exterior
- Rich color
Preventing Over-Browning
If the top browns too quickly:
- Cover loosely with foil
- Continue baking until fully cooked inside
Because heating elements are close to the bread, air fryers may brown faster than ovens.
Step 9: Check for Doneness
Tap Test
Tap the bottom of the bread.
A hollow sound indicates it is baked through.
Toothpick Test
Insert a toothpick into the center.
It should come out clean or with very dry crumbs.
Texture Test
The loaf should feel:
- Firm
- Light
- Slightly springy
Step 10: Cooling the Bread
Cooling is extremely important.
Why Cooling Matters
During cooling:
- Steam redistributes
- Interior structure stabilizes
- Texture improves
Cutting too early may create:
- Gumminess
- Dense texture
- Collapsed crumb
Cooling Instructions
- Remove bread from pan immediately
- Place on wire rack
- Cool at least 20–30 minutes
Texture and Flavor Adjustments
For Softer Bread
- Add milk
- Increase butter slightly
- Cover bread after cooling
For Crispier Crust
- Bake slightly longer
- Avoid covering after baking
- Brush lightly with oil before baking
Delicious Variations
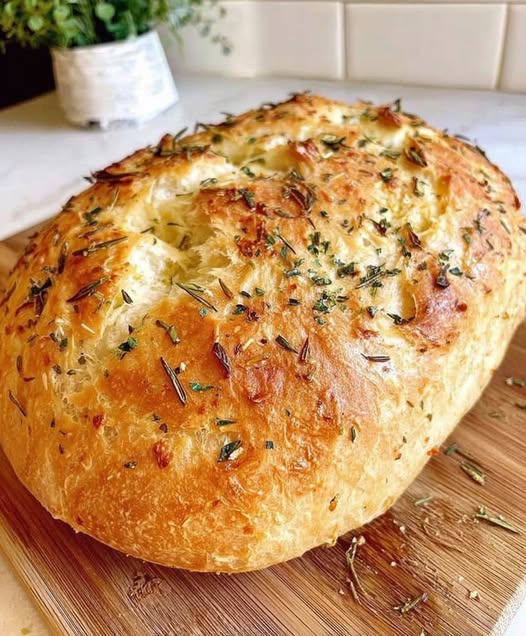
Garlic Herb Bread
Add:
- Garlic powder
- Italian herbs
- Parsley
Brush with garlic butter after baking.
Cheese Bread
Add shredded cheese into the dough or center.
Good options:
- Cheddar
- Mozzarella
- Parmesan
Sweet Bread
Increase sugar and add:
- Cinnamon
- Vanilla
- Raisins
Whole Wheat Bread
Replace up to half the flour with whole wheat flour.
Add slightly more liquid because whole wheat absorbs more moisture.
Common Bread Problems and Solutions
Bread Is Dense
Possible causes:
- Under-kneading
- Insufficient rise time
- Too much flour
Bread Did Not Rise
Possible causes:
- Expired yeast
- Water too hot
- Cold environment
Top Burned Too Fast
Possible causes:
- Temperature too high
- Bread too close to heating element
Solution:
- Cover loosely with foil
Bread Raw Inside
Possible causes:
- Baking temperature too high initially
- Bread too thick
- Insufficient bake time
Storage Instructions
Room Temperature
Store covered for:
- Up to 2 days
Refrigerator
Store for:
- Up to 5 days
Warm slightly before serving.
Freezing
Wrap tightly and freeze for:
- Up to 1 month
Thaw at room temperature before reheating.
Reheating Air Fryer Bread
Air fryers are excellent for refreshing leftover bread.
Reheat Settings
- 160°C (320°F)
- 3–5 minutes
This restores warmth and improves texture.
Frequently Asked Questions
Can I use bread flour?
Yes. Bread flour creates chewier bread with stronger structure.
Can I make bread without yeast?
Yes, but the texture will be more similar to soda bread or quick bread.
Why is my bread dry?
Too much flour or overbaking commonly causes dryness.
Can I add seeds or herbs?
Absolutely. Seeds, herbs, garlic, and cheese work very well in air fryer bread.