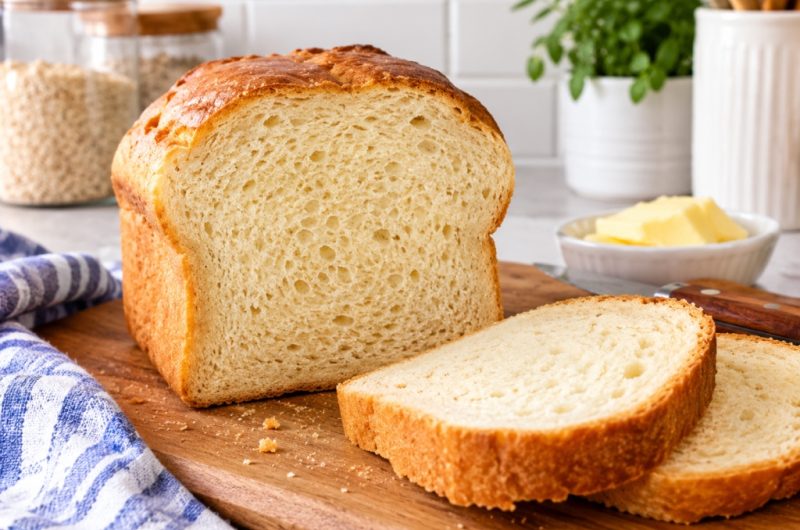
Finding a gluten-free bread that is genuinely soft, fluffy, and easy to slice can be surprisingly difficult. Many homemade gluten-free loaves turn out dry, crumbly, dense, or slightly gummy in the center. This squishy-soft gluten-free bread recipe takes a different approach.
It uses a simple combination of gluten-free flour, yeast, eggs, honey, oil, and psyllium husk powder to create a tender sandwich loaf with a soft crumb and lightly sweet flavor. The method is straightforward, requires only one rise, and is practical enough for everyday baking.
Why This Gluten-Free Bread Recipe Works
A Soft Texture Without Gluten
Traditional wheat bread gets much of its stretchy structure from gluten, which helps the dough trap air and hold its shape as it rises. Gluten-free dough behaves differently, so the ingredients and mixing method become especially important.
Psyllium husk powder helps retain moisture and supports the structure of the loaf, while eggs contribute richness and stability. The result is a gluten-free sandwich bread that stays soft rather than immediately falling apart when sliced.
An Easy One-Rise Method
One of the best features of this homemade gluten-free bread is the uncomplicated preparation. Instead of requiring several complicated stages, the dry ingredients are combined first, followed by the wet ingredients. The mixture is then beaten for several minutes before being transferred directly into a greased loaf pan.
After one rise in a warm place, the bread goes into the oven. This makes it a practical choice when you want fresh gluten-free bread without spending an entire day in the kitchen.
Ingredients That Make the Difference
Gluten-Free All-Purpose Flour
The flour is one of the most important components in this recipe because gluten-free flour blends can behave very differently from one another. A quality gluten-free all-purpose flour provides the foundation for the bread’s structure, texture, and flavor. The original recipe recommends Cup4Cup gluten-free flour, but specific alternatives can also be used with the adjustments described in the Notes section. Measuring the flour accurately is important because too much flour can produce a heavy loaf.
Psyllium Husk Powder
Psyllium husk powder is optional in the ingredient list, but it can make a noticeable difference in gluten-free baking. It helps absorb and hold moisture, giving the finished bread a softer texture and helping reduce crumbliness. Because gluten is absent, ingredients such as psyllium can provide additional support to the dough. A lighter-colored psyllium husk powder is preferable because darker varieties may affect the appearance of gluten-free baked goods.
Yeast, Baking Powder, and Salt
Instant rapid-rise yeast provides the main lift needed to create a light loaf. Baking powder gives the bread another source of leavening, while salt balances the flavor of the other ingredients. Together, these ingredients help create a loaf that rises properly and has enough structure to hold its shape after baking. Using instant yeast also keeps the preparation simple because it can be mixed directly into the dry ingredients.
Honey, Eggs, Oil, and Water
The wet ingredients each have an important role. Honey adds mild sweetness and contributes moisture, while eggs help provide structure and richness. Oil keeps the crumb tender and helps the bread remain soft. Warm water hydrates the gluten-free flour blend and activates the yeast. The water temperature matters, so it should be warm rather than extremely hot. Water around 110°F is used in the original recipe.
How to Make Soft Gluten-Free Sandwich Bread
Combine the Dry Ingredients
Begin by preparing the dry ingredients in the bowl of a stand mixer fitted with a paddle attachment. Add the gluten-free all-purpose flour, instant rapid-rise yeast, optional psyllium husk powder, baking powder, and salt. Mix them together on low speed until they are evenly distributed. This first step helps prevent pockets of yeast, salt, or baking powder from remaining concentrated in one area of the mixture.
Add the Wet Ingredients
Once the dry ingredients are combined, add the warm water, room-temperature eggs, honey, and oil. Start mixing on low speed so the ingredients can come together without splashing from the bowl. At this stage, the mixture will begin to resemble a thick, sticky batter rather than the elastic dough associated with traditional wheat bread. That difference is completely normal for gluten-free bread.
Beat the Mixture Thoroughly
Increase the mixer speed to medium and continue beating for five minutes. Scrape the paddle and sides of the bowl halfway through mixing to make sure everything is incorporated. This extended mixing time is important because it gives the gluten-free flour blend an opportunity to fully hydrate. The finished mixture should be sticky and fairly thick, with a consistency that can be transferred into the loaf pan using a spatula.
Preparing the Loaf for Its Single Rise
Transfer the Dough to the Pan
Grease a 9-by-4-inch baking pan and transfer the gluten-free bread mixture into it. Use a spatula to spread the mixture evenly and smooth the surface. Since this bread does not behave like traditional kneaded dough, there is no need to shape it by hand. A small Pullman-style loaf pan is also useful when you want a taller sandwich loaf with evenly shaped slices.
Let the Bread Rise
Cover the pan with a large piece of plastic wrap that has been lightly coated with nonstick cooking spray. Place the covered pan in a warm, draft-free location. Allow the bread to rise until it reaches approximately two-thirds of the way toward the top of the pan. This usually takes about 30 minutes, although the exact timing can vary depending on room temperature and yeast activity.
Avoid allowing the dough to rise too far before baking. Gluten-free bread can continue rising once it enters the hot oven, so letting it rise beyond the recommended point may cause the loaf to expand too much and then sink during baking. While the bread rises, preheat the oven to 350°F so it is ready when the dough reaches the correct height.
Baking Gluten-Free Bread Properly
Bake Until Fully Cooked
Remove the plastic wrap before placing the loaf in the oven. Bake it on the middle rack for approximately 40 to 50 minutes. Gluten-free bread can sometimes appear completely baked on the outside before the center has finished cooking, so relying only on its color can be misleading. A loaf that looks beautifully browned may still have excess moisture inside.
For the best result, use an instant-read thermometer to check the internal temperature. The center should reach approximately 205°F. If the bread is browning too quickly, loosely tent it with foil during the latter part of baking. This protects the crust while allowing the center additional time to cook through properly.
Allow the Loaf to Cool Completely
After baking, leave the bread in the pan for about five minutes before transferring it to a cooling rack. Allow it to cool completely before slicing, with at least two hours recommended. This waiting period is important because the internal crumb continues to set as the loaf cools. Cutting into the bread too soon can make the texture appear wetter or less stable than it actually is.
For a particularly tall loaf, allowing it to cool on its side can help prevent the center from sinking. Once fully cooled, the bread can be sliced and served at room temperature, toasted, or used for sandwiches, grilled cheese, and other everyday meals.
Choosing the Right Gluten-Free Flour
Why Flour Blends Behave Differently
Not all gluten-free flour blends absorb liquid in the same way. Different combinations of starches and gluten-free grains can create significant differences in moisture, structure, and texture. This is why a recipe that works perfectly with one flour may need adjustments when another blend is substituted. The original recipe was tested with several popular gluten-free flour options, with noticeable differences in the finished loaf.
Cup4Cup gluten-free flour produced a particularly soft loaf with a pleasant flavor and tender texture. King Arthur gluten-free options also performed well, although certain versions require adjustments to the water or psyllium husk powder. Bob’s Red Mill Gluten Free 1-to-1 Baking Flour can also be used with specific changes described in the Notes section. These adjustments are important because they help compensate for differences in how each flour absorbs moisture.
Optional Milk Powder Addition
Adding More Moisture
Milk powder is an optional addition that can help increase moisture in the bread. If using the suggested method, remove two tablespoons of gluten-free flour from the recipe and replace them with two tablespoons of gluten-free certified milk powder. This maintains the overall balance of the dry ingredients while introducing the additional milk powder.
This adjustment can be particularly useful when working with gluten-free flour blends whose formulation has changed. Since the ingredient is optional, the bread can still be prepared without it. The most important thing is to use the same quantities and adjustments consistently so the dough maintains the correct hydration.
Can You Make This Bread Without a Stand Mixer?
Mixer Options
A stand mixer with a paddle attachment is the easiest tool for preparing this recipe because the mixture is thick and sticky. However, a stand mixer is not necessarily the only option. A handheld mixer may also be used, although working with a substantial quantity of gluten-free flour can place more strain on the appliance and require additional effort.
Another option is a bread machine with a dedicated gluten-free setting. The recipe can be adapted for a machine by adding the wet ingredients to the bottom of the bread pan and placing the dry ingredients on top. The gluten-free cycle can then be selected. Because bread machines vary, results may differ depending on the appliance.
How to Store Gluten-Free Bread
Room-Temperature Storage
Homemade gluten-free bread generally has a shorter shelf life than conventional bread. Refrigeration is not ideal because cold temperatures can cause the bread to become dry and affect its soft texture. Once completely cooled, the loaf can be tightly wrapped and kept at room temperature for short-term use.
For the best texture, slice the entire loaf once it has cooled completely and freeze the slices individually or in a tightly sealed package. Freezing makes it easy to remove only the amount needed for a meal or snack.
Freezing Individual Slices
Frozen slices can be thawed before serving or toasted directly from frozen. If you plan to serve the bread at room temperature after freezing, allow it to defrost thoroughly first. Partially chilled gluten-free bread can become more crumbly, so complete thawing helps restore the softer texture.
This freezer-friendly approach is particularly useful for anyone who does not eat an entire loaf within a few days. Having individual slices ready in the freezer also makes homemade gluten-free sandwich bread much more convenient for everyday meals.
Ways to Use Homemade Gluten-Free Bread
Sandwiches, Toast, and Grilled Cheese
This soft gluten-free loaf works well for everyday sandwiches because the slices are tender without requiring heavy toasting. It can also be lightly toasted for breakfast or used to make grilled cheese. The mild sweetness from honey pairs nicely with both sweet and savory toppings, making the bread versatile enough for several meals.
Homemade Gluten-Free Breadcrumbs
If you have leftover slices that are no longer at their freshest, they can also be transformed into homemade gluten-free breadcrumbs. This is a useful way to reduce food waste and keep a convenient gluten-free ingredient available for other recipes. The breadcrumbs can be stored for later use in coatings, casseroles, meatballs, or other dishes that call for a crisp or binding component.
Notes for the Best Results
Flour Substitutions
When using King Arthur Measure-for-Measure gluten-free flour, the original recipe recommends adding an additional ¼ teaspoon salt and reducing the water to 1¼ cups plus 2 tablespoons, or 305 grams. Milk powder can also be incorporated using the method described earlier. These adjustments help account for differences in flavor and liquid absorption.
For King Arthur Gluten-Free Bread Flour, the original recipe recommends reducing the psyllium husk powder to ½ tablespoon because psyllium is already included in that flour blend. For Bob’s Red Mill Gluten Free 1-to-1 Baking Flour, the recommended adjustment is to omit the milk powder, reduce the water to 1¼ cups or 295 grams, and add ¼ cup cornstarch to the dry ingredients.
Psyllium Husk Powder
Psyllium husk powder is optional, but it can improve the texture of this gluten-free bread by helping retain moisture and reducing crumbliness. It does not significantly change the flavor. The lighter-colored variety is recommended because darker psyllium powders can give gluten-free baked goods a gray or purple appearance.
Bread Machine Method
A gluten-free bread machine setting can be used if your machine supports this type of recipe. Add the wet ingredients to the bottom of the bread pan and then add the dry ingredients. Select the gluten-free cycle and follow your machine’s recommended baking instructions. Because the recipe was not specifically developed around one particular machine, baking results may vary between models.
Soft, Fluffy Gluten-Free Bread
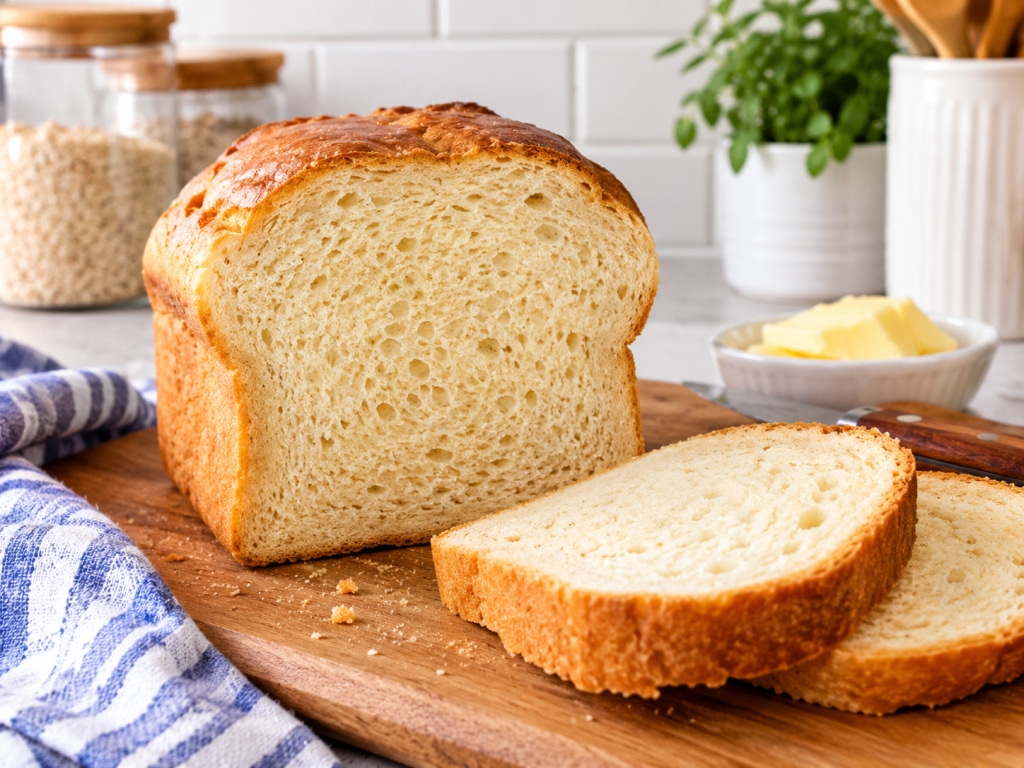
Enjoy soft, fluffy, and delicious homemade gluten-free bread with a tender texture and golden-brown crust. This easy yeast bread is dairy-free, requires just 30 minutes of rising time, and is perfect for sandwiches, breakfast toast, French toast, or serving alongside your favorite soups and meals.
14
servings10
minutes55
minutes147
kcal1
hour5
minutesIngredients
3 cups (438 g) gluten-free all-purpose flour, with Cup4Cup gluten-free flour highly recommended
1 packet (9 g / 2¼ teaspoons) instant rapid-rise yeast
1 tablespoon (11 g) psyllium husk powder, optional
1 teaspoon baking powder
1 teaspoon salt
1½ cups (338 g) warm water, 110°F
2 large eggs, room temperature
¼ cup (85 g) honey
¼ cup (55 g) oil
Directions
- Mix the Dry Ingredients:
Fit a stand mixer with a paddle attachment. Add the gluten-free flour, instant rapid-rise yeast, optional psyllium husk powder, baking powder, and salt. Mix on low speed until the dry ingredients are evenly combined. - Add the Wet Ingredients:
Pour in the warm water, room-temperature eggs, honey, and oil. Mix on low speed for about 1 minute, allowing the ingredients to come together into a thick, sticky mixture. - Beat the Dough:
Increase the mixer speed to medium and beat for 5 minutes. Scrape down the paddle and sides of the bowl halfway through mixing. The mixture should be thick and sticky rather than a traditional elastic bread dough. - Prepare the Loaf Pan:
Grease a 9-by-4-inch baking pan. Transfer the mixture into the pan and use a spatula to smooth the surface evenly. - Let the Bread Rise:
Lightly spray a large piece of plastic wrap with nonstick cooking spray and place it, greased side down, over the pan. Put the pan in a warm, draft-free location and allow the bread to rise until it reaches about two-thirds of the way to the top of the pan, approximately 30 minutes. - Preheat the Oven:
While the bread is rising, preheat the oven to 350°F. - Bake:
Remove the plastic wrap and place the loaf on the middle oven rack. Bake for 40–50 minutes. Loosely tent the loaf with foil during the latter part of baking if the top becomes too dark. The internal temperature should reach approximately 205°F. - Cool:
Allow the bread to cool in the pan for 5 minutes, then transfer it to a cooling rack. Let it cool completely for at least 2 hours before slicing. - Serve:
Serve the bread at room temperature, toasted, or grilled. For the best texture, avoid serving it partially chilled.
Notes
- Adding Milk Powder
Milk powder is optional. To add it, remove 2 tablespoons of gluten-free flour from the listed amount and replace it with 2 tablespoons of gluten-free certified milk powder. - King Arthur Measure-for-Measure Flour
When using King Arthur Measure-for-Measure gluten-free flour, add an additional ¼ teaspoon salt and reduce the water to 1¼ cups plus 2 tablespoons (305 g). The milk powder adjustment can also be used. - King Arthur Gluten-Free Bread Flour
When using King Arthur Gluten-Free Bread Flour, reduce the psyllium husk powder to ½ tablespoon because this flour blend already contains psyllium. - Bob’s Red Mill Gluten Free 1-to-1 Baking Flour
For Bob’s Red Mill Gluten Free 1-to-1 Baking Flour, omit the milk powder, reduce the water to 1¼ cups (295 g), and add ¼ cup cornstarch to the dry ingredients. - Psyllium Husk Powder
Psyllium husk powder helps retain moisture, improve structure, and reduce crumbliness. A lighter-colored powder is preferred because darker varieties can affect the color of the finished bread. - Bread Machine
This recipe can be prepared in a bread machine with a gluten-free setting. Place the wet ingredients in the bottom of the bread pan, add the dry ingredients on top, and use the machine’s gluten-free cycle. - Storage and Freezing
Gluten-free bread is best stored tightly wrapped at room temperature rather than refrigerated, as refrigeration can dry out the loaf. For longer storage, cool the bread completely, slice it, and freeze the slices. Frozen slices can be thawed before serving or toasted directly from frozen.
Nutrition Facts
- Calories: 147kcal
- Fat: 5g
- Carbohydrates: 24g
- Fiber: 3g
- Sugar: 6g
- Protein: 3g