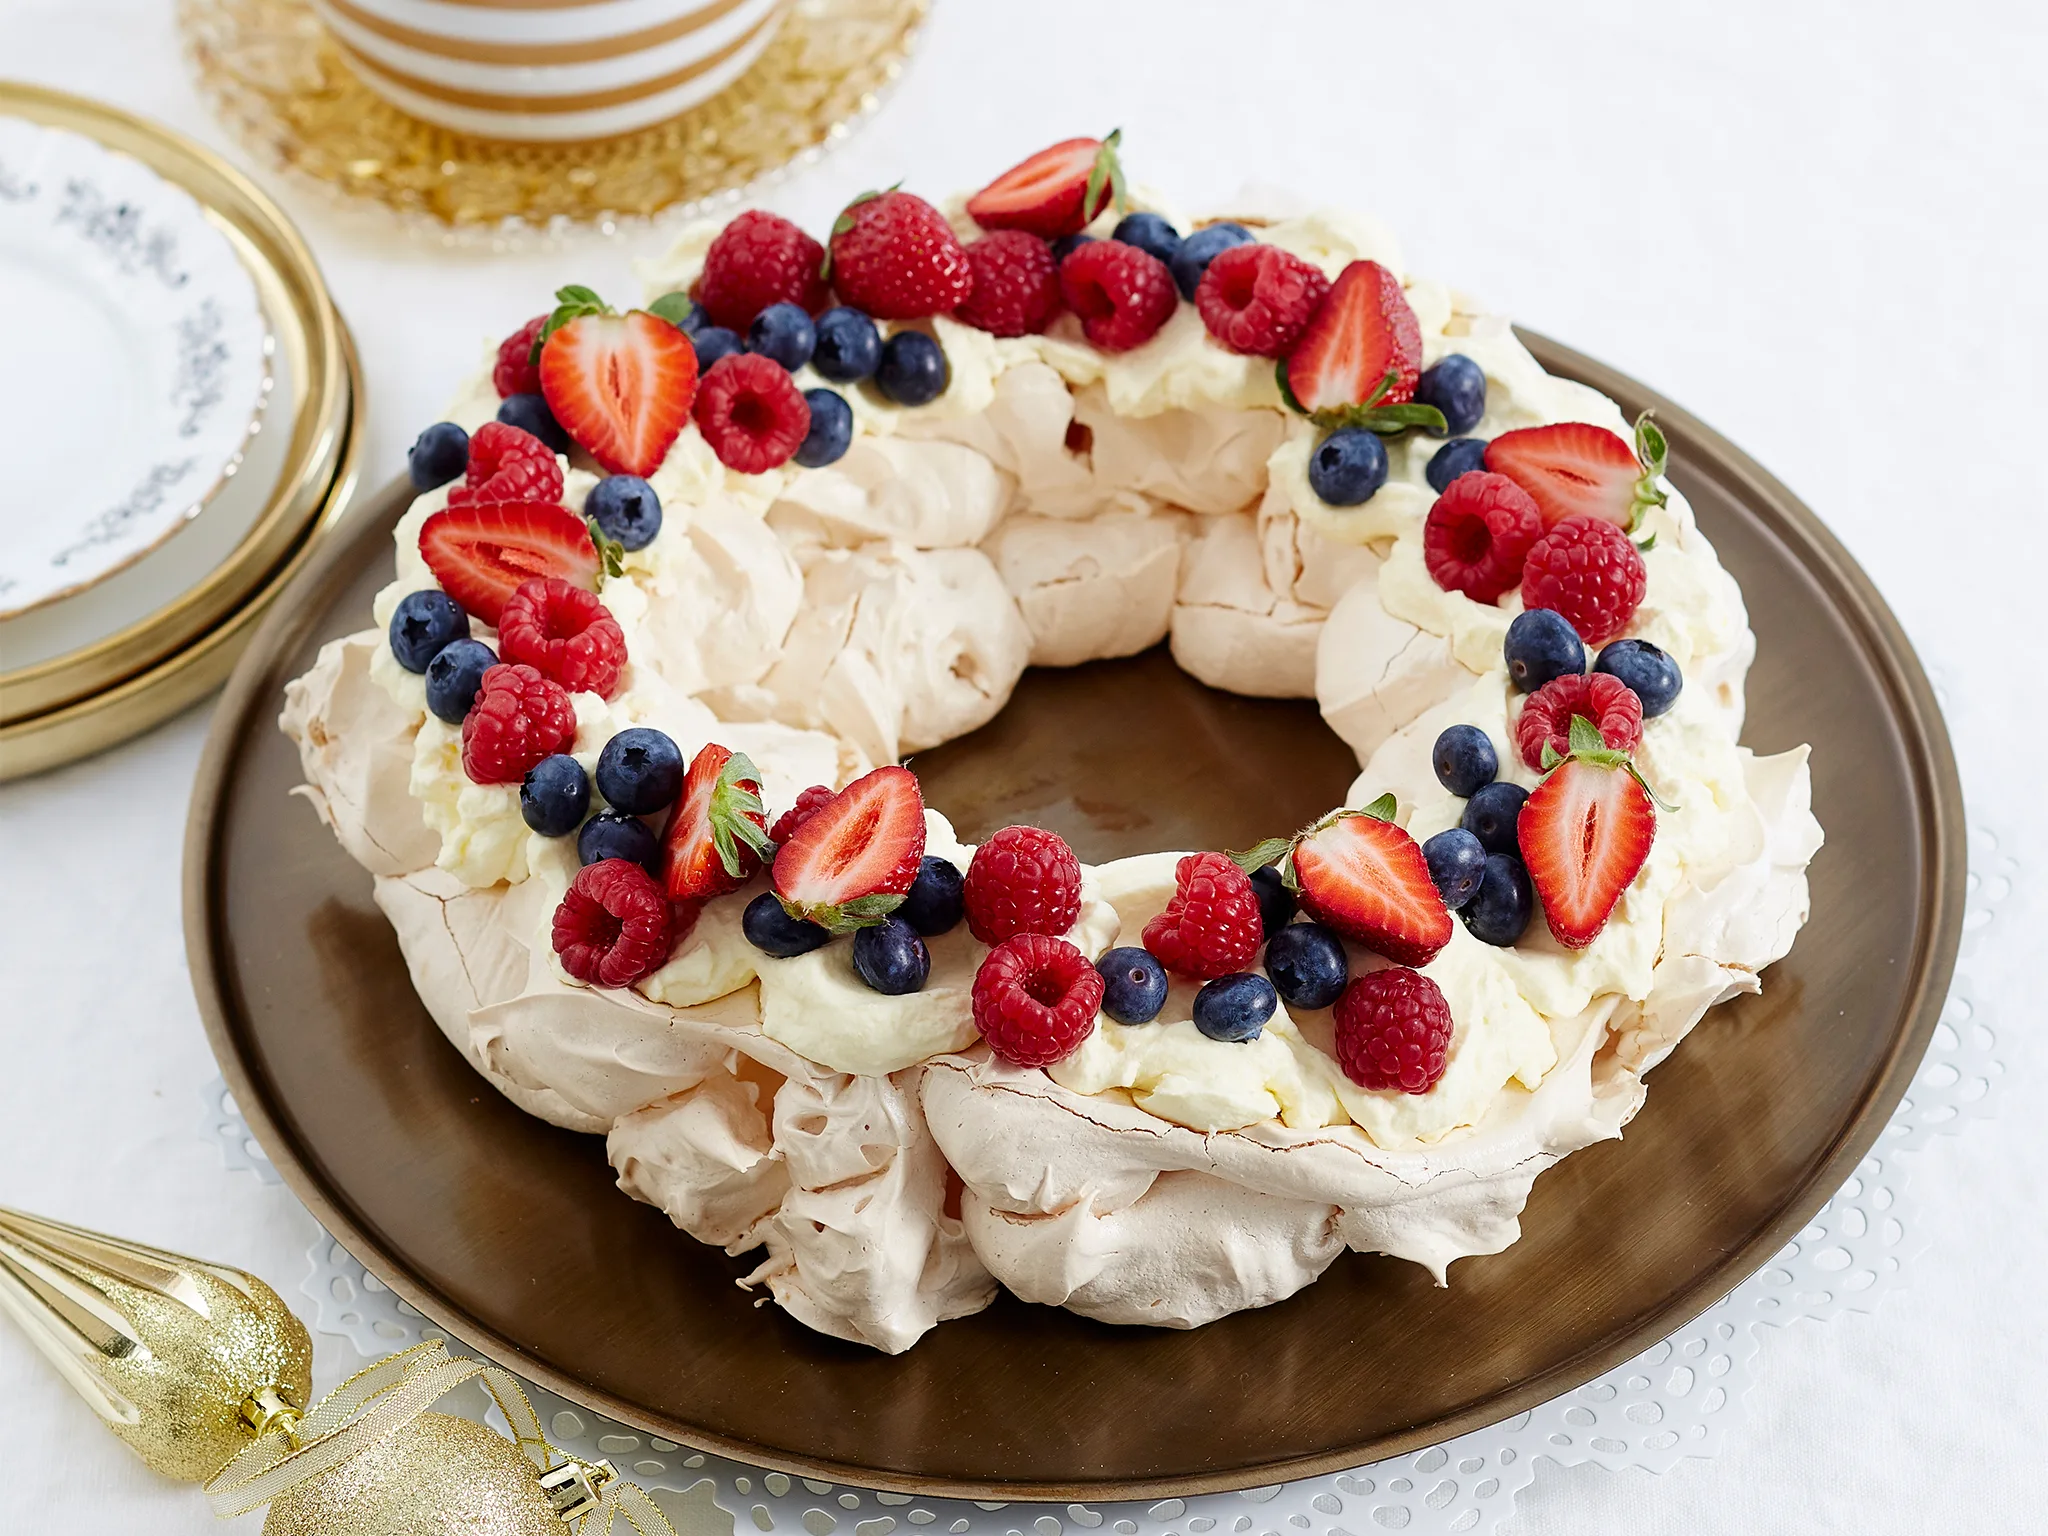
This Christmas pavlova wreath is a light and elegant festive dessert made with crisp meringue, dairy-free whipped cream, and colorful fresh berries. The circular wreath shape makes it especially attractive for a Christmas table, while the combination of strawberries, raspberries, and blueberries adds natural color without requiring complicated decoration. The recipe is naturally gluten-free and uses dairy-free cream for the topping.
The meringue has a delicate crisp shell and a soft, marshmallow-like center. Dairy-free whipped cream adds richness, while the fresh berries balance the sweetness with a juicy and slightly tart flavor. Although the finished dessert looks impressive, it uses familiar ingredients and a straightforward preparation method that can be followed by home bakers with basic equipment.
A pavlova wreath is also a useful alternative to heavy Christmas cakes, pies, or puddings. Its airy meringue base creates a lighter finish after a festive meal. The dessert serves approximately eight people and can be decorated shortly before serving, making it suitable for Christmas dinner, holiday parties, Boxing Day gatherings, and winter celebrations.
Why This Christmas Pavlova Wreath Works
The success of this festive pavlova comes from the contrast between its different textures. Slowly baked meringue develops a dry, crisp exterior while retaining a soft center. Whipped dairy-free cream provides a smooth topping, and fresh berries contribute color, moisture, and freshness.
White wine vinegar and cornflour help create the characteristic pavlova texture. The vinegar supports a tender center, while the cornflour helps stabilize the meringue. Vanilla extract adds a warm flavor that complements both the sweet meringue and fresh fruit.
Forming the meringue into a ring transforms a classic pavlova into a Christmas wreath dessert. A small bowl placed temporarily in the center of the baking tray acts as a guide, making it easier to create an even circle without special equipment or a printed template.
Preparing the Egg Whites Correctly
Egg whites form the structure of the pavlova, so they must be handled carefully. Use a clean, dry mixing bowl and clean whisk attachments. Any grease, water, or egg yolk may prevent the whites from reaching the volume and stability required for a successful meringue.
Separate the eggs carefully while they are cold because cold eggs are often easier to divide. After separating, allow the whites to lose some of their chill if time permits. Room-temperature egg whites generally whip to a larger volume, although the original method can still work when the whites are used directly.
The recipe requires five medium egg whites. Egg size can affect the ratio of sugar to liquid, so use the stated medium size rather than changing to a different quantity of larger eggs. Place the yolks aside for another suitable recipe.
Whipping Egg Whites to Stiff Peaks
Begin whisking the egg whites at low speed until they become foamy. Starting slowly creates smaller, more stable air bubbles and reduces splashing. Once an even foam develops, increase the mixer to medium speed.
Continue whisking until the egg whites form stiff peaks. When the whisk is lifted, the peak should remain upright rather than folding immediately. The mixture should look white, smooth, and voluminous.
Do not add the sugar before the egg whites have reached this stage. Adding it too soon may prevent the whites from gaining enough volume. The properly whipped egg whites create the foundation that supports the sugar and helps the wreath maintain its shape during baking.
Adding the Caster Sugar Gradually
Caster sugar must be added one tablespoon at a time while the mixer continues running. This gradual method allows each addition to dissolve before more sugar is introduced. Pouring in a large quantity at once can weigh down the egg whites and produce a loose or runny meringue.
Continue whisking until all 250 grams of caster sugar have been incorporated. The mixture should become thick, glossy, and firm. Rub a small amount between two clean fingers; it should feel mostly smooth rather than noticeably grainy.
This step requires patience, but it is essential for a stable pavlova. Undissolved sugar may cause beads of syrup, excessive weeping, or a rough surface during baking. A properly mixed meringue should hold its shape when spooned onto the prepared tray.
Adding Vinegar, Cornflour, and Vanilla
After the sugar has been fully incorporated, whisk in the white wine vinegar, followed by the cornflour and vanilla extract. Add them in the order given and mix only until evenly distributed.
White wine vinegar contributes acidity, which supports the meringue structure and helps create a soft center. The finished dessert should not taste strongly of vinegar because only one teaspoon is used.
Cornflour helps absorb some moisture and contributes to the characteristic marshmallow interior. Vanilla extract rounds out the sweetness and adds a familiar dessert aroma. Avoid prolonged mixing after these ingredients are added because the meringue is already fully whipped.
Creating the Christmas Wreath Shape
Line a large baking tray with baking paper before shaping the pavlova. Place a small bowl in the center of the lined tray to serve as a temporary guide. The bowl should leave enough room around it for a thick ring of meringue.
Spoon the meringue around the outside of the bowl, creating a continuous circular shape. Keep the wreath reasonably even in width and height so that it bakes at a consistent rate. Join the ends carefully so there are no weak gaps.
Remove the guide bowl before baking. Do not leave it on the tray or press it into the meringue. Once removed, the center should remain open, giving the pavlova its recognizable wreath appearance.
Shaping the Meringue for Decoration
Use the back of a spoon to create gentle peaks and swirls on the surface. These irregular areas will become lightly crisp and give the wreath an attractive handmade appearance.
Create a shallow channel along the top if desired, giving the whipped cream and berries a secure place to sit. Do not make the center too thin because a delicate base may crack under the weight of the toppings.
The wreath does not need to be perfectly smooth or symmetrical. Small variations add character, and much of the upper surface will be covered with cream and fruit after cooling.
Baking the Pavlova Slowly
Preheat the oven to 150°C and place the shaped pavlova inside. Bake it for approximately one hour to one hour and fifteen minutes. The meringue should feel dry on the exterior while remaining pale rather than deeply browned.
Every oven behaves slightly differently, so begin checking near the one-hour mark. Avoid repeatedly opening the oven because sudden temperature changes can cause the meringue to crack or collapse.
Some cracking is normal for pavlova and does not mean the recipe has failed. The whipped topping and fresh fruit can cover small imperfections while the crisp shell and soft center remain enjoyable.
Cooling the Pavlova in the Oven
When the baking time is complete, turn off the oven but leave the pavlova inside with the door closed. Allow it to cool completely before removing it.
Slow cooling reduces the sudden temperature change that can cause severe cracking or collapse. The resting period should last for approximately one hour or until the oven and pavlova have cooled fully.
Do not add cream while the meringue is warm. Heat will soften or melt the whipped topping and may cause the crisp shell to absorb moisture too quickly. Move the cooled wreath carefully because meringue is naturally delicate.
Preparing the Dairy-Free Cream
Pour 150 milliliters of dairy-free double cream into a clean mixing bowl. Whisk until it forms stiff peaks and holds its shape. Add one tablespoon of icing sugar, then whisk again briefly until combined.
The exact whipping time depends on the cream product. Some plant-based creams whip faster than others, so follow the product instructions and avoid overwhipping. The cream should be firm enough to remain on the wreath without becoming grainy.
Keep the whipped cream refrigerated until the pavlova is completely cool and ready to decorate. Using cold cream usually produces better volume and stability.
Checking Dairy-Free Cream Labels
Not every product described as plant-based is suitable for someone with a milk allergy. Some dairy-free-style creams may carry a “may contain milk” warning because they are manufactured where cross-contact can occur.
For a person with a medically diagnosed milk allergy, use a product specifically considered safe for that individual. A product suitable for lactose intolerance may not necessarily be appropriate for a milk-protein allergy.
Ingredient and allergen statements may differ between countries and brands, so read the package every time. The same attention should be given to other packaged ingredients if strict dietary safety is required.
Decorating with Fresh Berries
Spread or dollop the whipped cream over the cooled meringue wreath. Keep the cream mainly on the upper surface so the circular shape remains visible.
Arrange strawberries, raspberries, and blueberries across the cream. The recipe does not specify exact fruit quantities, allowing the decoration to be adjusted according to the size of the fruit and the desired appearance.
Dry the berries thoroughly after washing. Water left on their surfaces can soften the meringue and cause the fruit to slide. Add the berries shortly before serving for the freshest presentation and crispest base.
Using Different Fresh Fruit
The original recipe uses strawberries, raspberries, and blueberries, but its general method works with many fresh fruits. However, any variation would change the original topping selection and should be treated as an optional serving idea rather than part of the core recipe.
When choosing fruit, avoid pieces that release excessive liquid. Very wet fruit may dissolve the meringue surface and create a watery cream layer.
Cut larger fruit into manageable pieces and keep small berries whole when suitable. A mixture of colors and shapes helps create the decorative appearance associated with a festive pavlova wreath.
Preventing a Soft or Weeping Meringue
A pavlova can release moisture when the sugar has not dissolved properly, when the environment is very humid, or when the decorated dessert is stored for too long. Adding the sugar slowly and whisking thoroughly reduces this risk.
Make sure all bowls and utensils are dry and free from grease. Whip the egg whites to stiff peaks before adding the sugar, and cool the baked wreath completely inside the switched-off oven.
Decorate as close to serving time as practical. Whipped cream and fresh fruit add moisture, so the meringue gradually softens after the toppings are applied.
Making the Pavlova Ahead
The undecorated meringue wreath can be prepared before the final serving time, provided it is kept dry. Once completely cool, store it in an airtight container at room temperature.
Do not refrigerate the plain meringue if it can be avoided because refrigerator humidity may make the exterior sticky. Add the whipped dairy-free cream and fresh berries closer to serving.
If the completed pavlova must be stored, place it in the refrigerator. It will remain edible, but its texture will gradually soften as it absorbs moisture from the cream and fruit.
Storage Instructions
The decorated Christmas pavlova wreath can be refrigerated for up to two or three days, according to the supplied guidance. However, it has the best appearance and texture on the day it is assembled.
Cover it carefully without pressing wrapping directly onto the cream or fruit. A covered cake container is useful because it protects the delicate meringue and prevents refrigerator odors from affecting the dessert.
Expect the meringue to become softer during storage. This is natural once whipped cream and fresh fruit have been added and does not necessarily mean the dessert has spoiled.
Serving the Christmas Pavlova Wreath
Place the decorated wreath on a large flat serving plate or cake stand. Use a sharp knife with a gentle sawing motion to cut it into eight portions.
Pavlova naturally cracks and crumbles during slicing, so perfectly neat portions are not necessary. Use a wide cake server to lift each piece while supporting the soft center and cream.
Serve the dessert chilled or after a brief rest at cool room temperature. Avoid leaving the dairy-free cream unrefrigerated for an extended period.
Important Notes for Reliable Results
Use a clean, grease-free bowl and make sure no egg yolk enters the whites. Whip the egg whites to stiff peaks before beginning to add sugar.
Add the caster sugar one tablespoon at a time and whisk until the meringue becomes glossy and the sugar has mostly dissolved. Shape the wreath evenly and remove the guide bowl before baking.
Cool the pavlova completely inside the switched-off oven. Add whipped cream and thoroughly dried berries only after the meringue is cold, preferably shortly before serving.
Why This Festive Pavlova Is Worth Making
This gluten-free and dairy-free Christmas pavlova wreath creates an impressive holiday centerpiece without requiring complicated cake decoration. The circular meringue base provides a festive shape, while the white cream and colorful berries give it a bright seasonal appearance.
The contrast between crisp meringue, soft center, whipped cream, and fresh fruit makes each serving interesting without feeling excessively heavy. It is especially useful for guests who require a gluten-free dessert, provided all packaged ingredients are checked carefully.
With 15 minutes of active preparation, a slow bake, and an undisturbed cooling period, this Christmas pavlova wreath offers a manageable way to prepare a memorable dessert for approximately eight people.
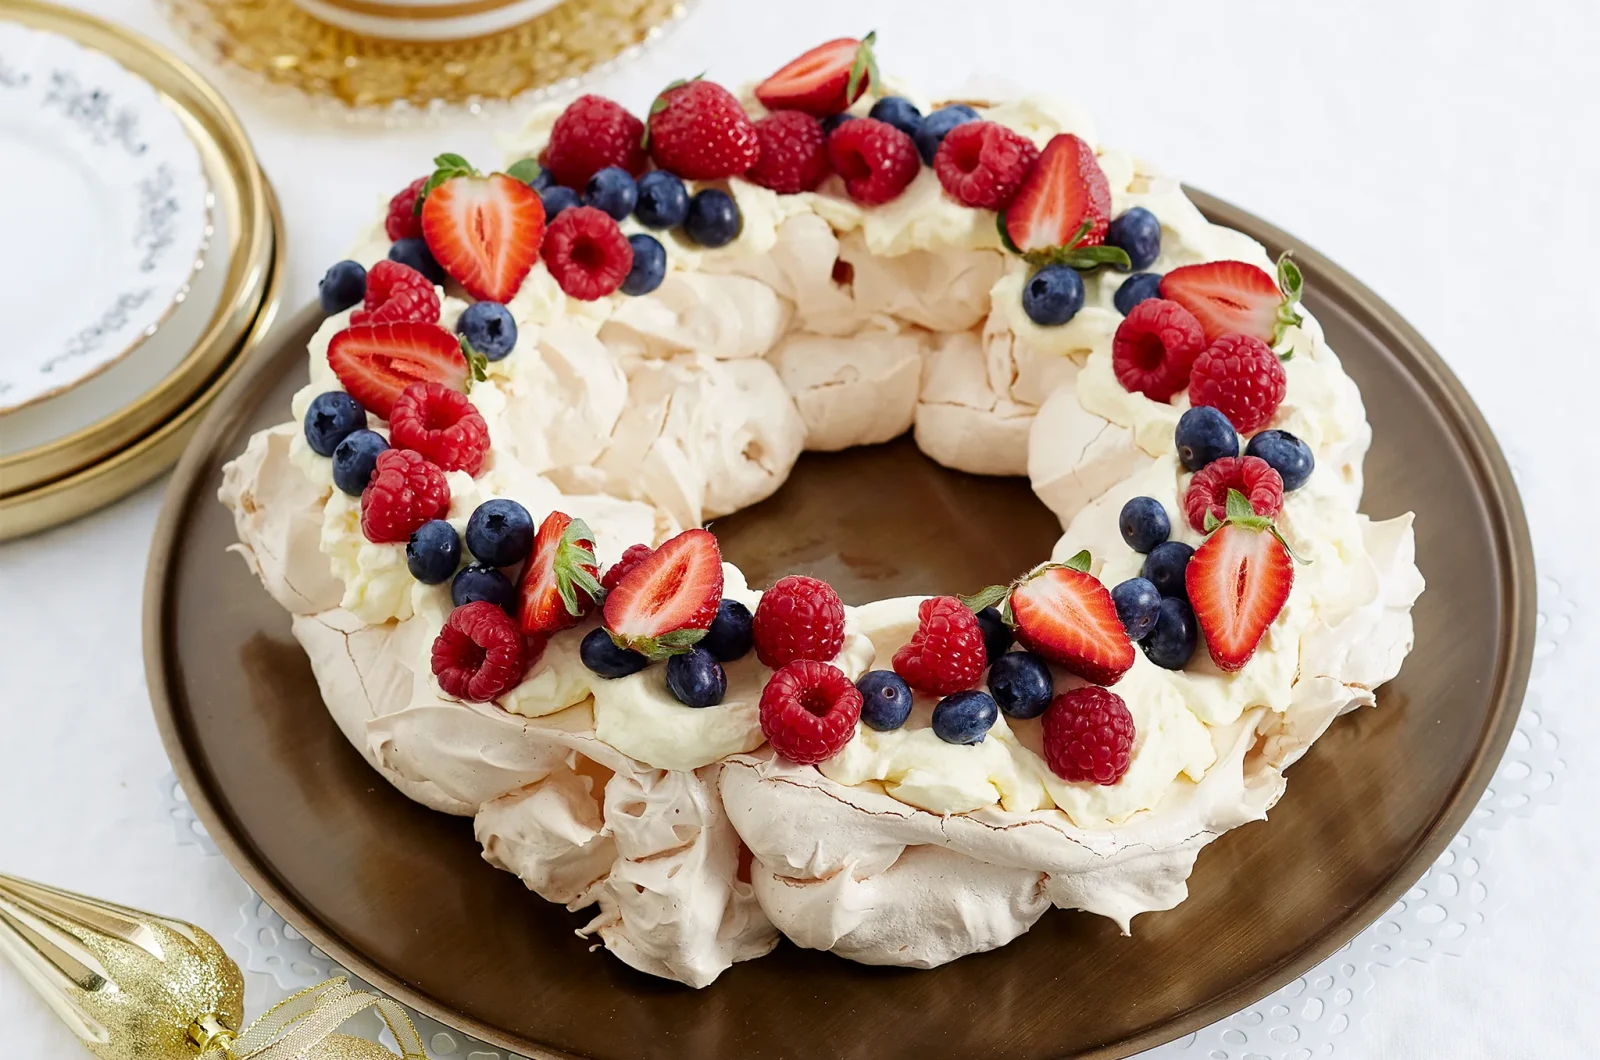
Pavlova Wreath (gluten free and dairy free)
A festive pavlova wreath with a crisp meringue shell, soft center, dairy-free whipped cream, and fresh strawberries, raspberries, and blueberries
8
servings15
minutes1
hour15
minutes210
kcal60
minutes2
hours30
minutesIngredients
- Meringue
5 medium egg whites
250 g caster sugar
1 teaspoon white wine vinegar
1 teaspoon cornflour
1 teaspoon vanilla extract
- Toppings
150 ml dairy-free double cream
1 tablespoon icing sugar
Strawberries
Raspberries
Blueberries
Directions
- Preheat the oven to 150°C.
- Line a large baking tray with baking paper.
- Whisk the egg whites on low speed until foamy.
- Increase to medium speed and whisk to stiff peaks.
- Add the caster sugar one tablespoon at a time.
- Whisk until the meringue is stiff and glossy.
- Whisk in the vinegar, cornflour, and vanilla.
- Place a small bowl in the tray’s center.
- Spoon the meringue around it to form a wreath.
- Remove the bowl and bake for 1–1¼ hours.
- Turn off the oven and cool inside with the door closed.
- Whisk the dairy-free cream to stiff peaks.
- Add the icing sugar and whisk briefly.
- Spoon the cream over the cooled wreath.
- Decorate with strawberries, raspberries, and blueberries.
Nutrition Facts
8 servings per container
- Amount Per ServingCalories210
- % Daily Value *
- Total Fat
6g
8%
- Total Carbohydrate
38g
14%
- Protein 2g 4%
* The % Daily Value tells you how much a nutrient in a serving of food contributes to a daily diet. 2,000 calories a day is used for general nutrition advice.