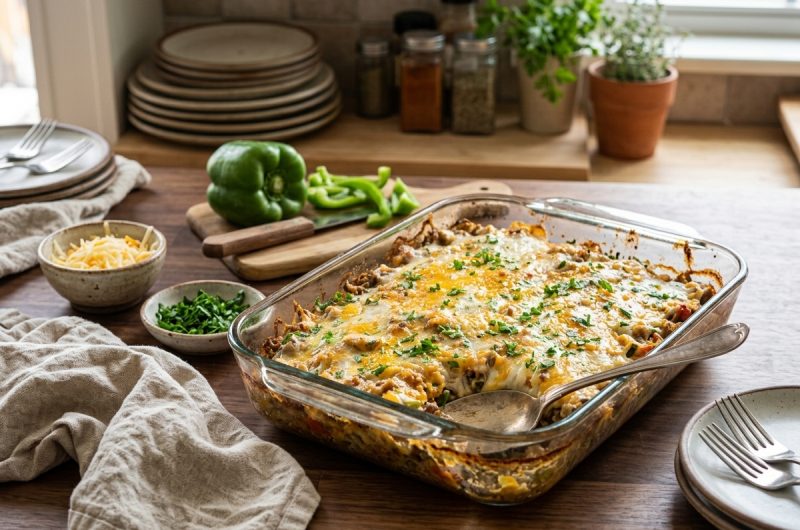
If you love the bold flavors of tacos but want something easier to prepare for a family dinner, this Cheesy Mexican Taco Casserole is a great choice. It combines seasoned ground beef, creamy cheese, cauliflower rice, salsa, low-carb tortillas, and plenty of shredded Colby Jack cheese in one comforting baked dish.
The result is a warm, hearty casserole with layers of savory taco flavor and a golden, cheesy topping that makes an ordinary weeknight meal feel special.
This low-carb taco casserole is especially useful when you want a filling dinner without spending a long time assembling individual tacos. Instead of preparing separate tortillas and toppings for everyone, everything is layered into one baking dish and cooked together. The beef mixture becomes rich and creamy, the tortillas soften as they bake, and the cheese melts into the layers to create a satisfying combination of textures and flavors.
Why This Low Carb Taco Casserole Works
There are several reasons this Mexican taco casserole can become a regular part of your dinner rotation. First, it uses familiar ingredients that are easy to combine. Ground beef provides a hearty base, while cauliflower rice adds bulk without relying on a large amount of traditional rice. Cream cheese and heavy whipping cream create a rich texture, while salsa and taco seasoning bring the familiar Mexican-inspired flavor you expect from a taco dinner.
The recipe is also designed to be practical for busy evenings. The beef can be browned while the cauliflower rice is being prepared, allowing several components to come together at the same time. Once the creamy taco mixture is ready, it is layered with low-carb tortillas and shredded cheese before going into the oven. The baking process finishes everything together and gives the cheese time to melt beautifully across the top.
A Comforting Family Dinner
Casseroles are popular because they bring several parts of a meal together in one dish, and this recipe follows that same idea. The seasoned beef mixture is rich enough to stand on its own, but layering it with tortillas and cheese makes the final dish more substantial. Each serving contains a mixture of meat, vegetables, creamy sauce, tortilla, and melted cheese, giving you a balanced bite instead of a simple skillet of taco meat.
The creamy texture also helps make this casserole feel especially comforting. Cream cheese is incorporated directly into the cooked beef, creating a smooth mixture rather than leaving small pieces of cheese throughout the dish. Heavy whipping cream and beef broth then help loosen the mixture, while cauliflower rice absorbs some of the flavorful liquid. The finished filling should remain slightly saucy so the tortillas do not become dry during baking.
How to Make Taco Casserole with Ground Beef
Brown the Ground Beef
Start by preheating the oven to 350°F and preparing a 9 x 9-inch casserole or baking dish. Brown the ground beef in a skillet together with the chopped yellow onion and bell pepper. Cook until the beef is fully browned, then drain any excess fat if needed. At the same time, prepare the riced cauliflower according to the package directions so it is ready to add to the skillet.
Using prepared cauliflower rice keeps the recipe convenient, but freshly riced cauliflower can also be used. The important point is to steam or cook the cauliflower before adding it to the meat mixture. Properly cooked cauliflower rice blends more easily with the creamy taco filling and helps the casserole maintain its intended texture.
Create the Creamy Taco Filling
Once the beef has been browned and drained, return it to the skillet and add the cream cheese. Stir and work the cream cheese into the meat with a wooden spoon until it has melted and the mixture becomes smooth. This step is important because it creates the creamy foundation of the casserole rather than leaving larger pieces of cream cheese throughout the filling.
Next, add the steamed cauliflower rice, heavy whipping cream, beef broth, taco seasoning, salsa, and pepper. Stir everything together thoroughly so the seasoning and creamy ingredients are distributed evenly. Bring the mixture to a boil over higher heat, then reduce the heat and allow it to simmer for about five minutes with the lid on.
Get the Right Consistency
The consistency of the taco filling matters more than you might expect. After simmering, remove the lid and check how much liquid remains in the skillet. If the mixture looks too loose, continue simmering over low heat until some of the moisture evaporates and the filling thickens. However, do not make it completely dry.
A slightly saucy mixture is ideal because the tortillas will absorb some of the moisture as the casserole bakes. If the filling becomes too thick, a small amount of additional broth can be used to loosen it. Since stovetops and cookware can vary, use the appearance of the mixture as your guide. The goal is a thick, creamy taco filling that still has enough moisture to keep the casserole tender.
How to Layer the Mexican Taco Casserole
Build the First Layer
Once the taco mixture is ready, spread approximately one-third of it across the bottom of the prepared 9 x 9-inch casserole dish. Follow with one-third of the shredded Colby Jack cheese. Place one low-carb tortilla in the center of the dish.
The tortillas are layered rather than simply placed on top. To help cover the corners of the casserole, cut another tortilla into pieces using a knife or pizza cutter. Arrange some of those pieces around the corners so the taco mixture underneath is covered as evenly as possible. This simple technique makes it easier to create complete layers in a square baking dish.
Repeat the Layers
Continue by adding another portion of the taco meat mixture followed by shredded cheese and another tortilla layer. Use additional tortilla pieces around the corners where necessary. Repeating the layers gives the casserole its characteristic taco-bake structure, allowing the meat, cheese, and tortillas to come together throughout the dish.
Finish with the remaining taco mixture and cover the top generously with the final portion of shredded cheese. The cheese melts over the surface during baking and creates a rich topping that ties all the layers together. Because the casserole is already cooked before it reaches the oven, the baking stage is mainly about heating everything through and melting the cheese.
Baking the Taco Casserole
Place the assembled casserole in the preheated 350°F oven and bake for approximately 20 to 25 minutes. The casserole should be hot throughout, with the cheese fully melted across the top. Once it is finished, remove it from the oven and allow it to rest briefly before serving.
Freshly chopped parsley can be sprinkled over the finished casserole, or cilantro can be used if preferred. The fresh herbs add a little color and freshness to the rich, cheesy dish. You can also serve individual portions with your favorite low-carb taco toppings for a more customizable dinner.
Low Carb Taco Casserole Toppings
Fresh and Creamy Toppings
Taco toppings are an easy way to change the character of each serving. Sour cream adds a cool, creamy contrast to the warm casserole, while avocado provides a rich texture that works especially well with seasoned beef. Fresh salsa can add another layer of tomato flavor, and diced tomatoes bring a fresh element to the finished dish.
Spicy Toppings
If you enjoy extra heat, sliced jalapeños are an easy addition. You can also serve the casserole with additional salsa or other favorite spicy toppings. Green onions and fresh cilantro can provide a fresh contrast to the rich meat and cheese, while shredded lettuce can add crunch when served alongside or on top of individual portions.
Easy Ways to Customize the Casserole
One of the useful things about this recipe is how easily the finished casserole can be adapted to suit different preferences. If you prefer a spicier taco bake, additional jalapeños, green chilies, or hot sauce can be served with the finished dish. These additions can be adjusted at the table, allowing everyone to control the amount of heat in their own serving.
For a different protein, the original preparation notes that ground turkey or ground chicken can be used in place of ground beef. Vegetables can also be varied according to preference, with options such as additional bell pepper, onion, zucchini, or spinach fitting naturally into a casserole like this.
The cheese can be changed as well. Colby Jack provides a mild, creamy finish, but cheddar, a Mexican-style cheese blend, or pepper jack can create a different flavor profile. If you want an even creamier result, additional cream cheese or sour cream can be incorporated according to your preference. These options make the recipe flexible while preserving its basic taco casserole structure.
Keeping the Recipe Lower in Carbohydrates
This recipe is designed as a low-carb taco casserole rather than a strictly keto casserole. The original preparation uses low-carb flour tortillas, and the source notes that these tortillas contain wheat, so the dish should not automatically be considered 100% keto-friendly. The original recipe uses three low-carb tortillas across nine servings, which helps keep the amount of tortilla per serving relatively modest.
If you are following a stricter keto or grain-free eating plan, you can use an appropriate homemade grain-free tortilla instead. Coconut-flour and almond-flour tortilla options are suggested in the source as alternatives. However, these substitutions are optional and are not part of the original ingredient list used for this recipe.
Can You Make Taco Casserole Ahead?
Yes, this casserole is convenient to prepare ahead of time. Assemble the dish according to the recipe, cover it, and refrigerate it until you are ready to bake. Preparing it in advance can be especially helpful when you know you will have a busy evening and want dinner ready to go into the oven.
The original notes recommend keeping an assembled unbaked casserole refrigerated for no more than two days before baking. When you are ready to cook it, bake it until it is thoroughly heated and the cheese is melted. Depending on how cold the casserole is when it goes into the oven, it may require additional heating time.
How to Store Leftover Taco Casserole
Allow leftover casserole to cool before transferring it to an airtight container. Store it in the refrigerator and enjoy it within a few days. Individual portions can be reheated in the microwave for convenience, while larger portions can be warmed in the oven until heated through.
Because the casserole contains several creamy ingredients, reheating it gently can help maintain a pleasant texture. If a portion seems dry after refrigeration, serving it with salsa, sour cream, avocado, or another favorite taco topping can bring back some moisture and freshness.
Can You Freeze Taco Casserole?
This taco casserole can also be frozen, making it a useful make-ahead dinner. The original recipe notes that it can be frozen for up to three months. For best results, allow the casserole to cool completely before storing it in a freezer-safe container or properly wrapping it for freezing.
When you are ready to use a frozen casserole, allow it to defrost in the refrigerator overnight before baking or reheating. Thawing gradually helps the casserole warm more evenly. The source specifically recommends defrosting in the refrigerator overnight before baking.
Notes for the Best Results
Keep the Filling Slightly Saucy
Do not cook all the moisture out of the taco mixture before layering. The tortillas absorb some of the liquid during baking, so starting with a slightly saucy filling helps prevent the finished casserole from becoming dry. If your mixture looks extremely thick before assembly, loosen it with a small amount of broth.
Prepare the Cauliflower Rice
The cauliflower rice should be steamed before it is incorporated into the taco mixture. Prepared steam-in-the-bag cauliflower rice makes the process quick, but freshly riced cauliflower can also be prepared at home. Properly cooked cauliflower blends into the filling while helping add volume to the casserole.
Use Low-Carb Tortillas
For the intended lower-carb version, use the low-carb tortillas specified in the ingredient list. If you are following a stricter grain-free or keto plan, a suitable homemade tortilla can be substituted, but that would change the original preparation.
What to Serve with Taco Casserole
This casserole is filling enough to serve as a complete dinner, but simple sides can make the meal more varied. A crisp green salad, sliced avocado, fresh tomatoes, or a small serving of additional vegetables can provide freshness alongside the rich taco layers.
For a taco-night presentation, place bowls of salsa, sour cream, jalapeños, green onions, cilantro, and avocado on the table. Everyone can add their preferred toppings after serving, which makes this casserole particularly suitable for family dinners or casual gatherings.
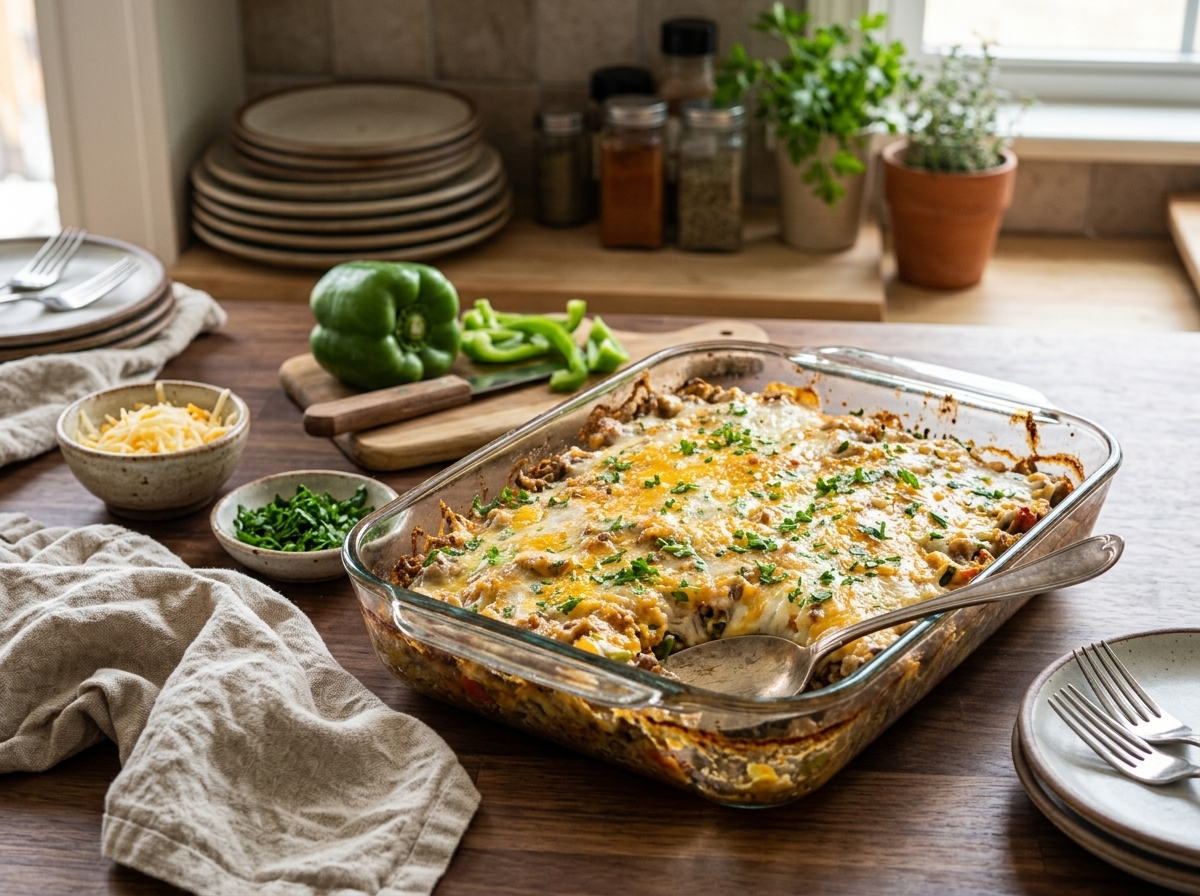
High-Protein Cheesy Mexican Taco Casserole
A hearty low-carb taco casserole made with seasoned ground beef, cauliflower rice, cream cheese, salsa, low-carb tortillas, and melted Colby Jack cheese.
9
servings20
minutes25
minutes417
kcal45
minutesIngredients
1 ¼ lbs ground beef
¼ medium yellow onion
¼ medium bell pepper, chopped
½ cup heavy whipping cream
½ cup beef broth
3 oz cream cheese
10 oz riced cauliflower, steam bag
3 tbsp taco seasoning
1/2 cup salsa
1/4 tsp pepper
3 Mission tortillas, low carb
3 cups Colby Jack cheese, shredded
1/2 tsp fresh parsley, chopped
Directions
- Preheat the oven to 350°F.
- Grease a 9 x 9-inch baking or casserole dish.
- Brown the ground beef in a skillet with the chopped yellow onion and bell pepper. Cook until the beef is browned, then drain it. Meanwhile, steam the riced cauliflower according to the package directions.
- Return the cooked ground beef to the skillet. Add the cream cheese and stir with a wooden spoon until the cream cheese melts completely into the beef.
- Add the steamed cauliflower rice, heavy whipping cream, beef broth, taco seasoning, salsa, and pepper. Stir well to combine.
- Bring the mixture to a boil over high heat. Reduce the heat to medium, cover, and simmer for 5 minutes.
- Remove the lid and check the consistency. If there is too much liquid, simmer uncovered over low heat until the mixture thickens. Keep it slightly saucy so the tortillas remain moist during baking.
- Spread approximately one-third of the taco meat mixture over the bottom of the prepared casserole dish.
- Add one-third of the shredded Colby Jack cheese.
- Place one low-carb tortilla in the center. Cut another tortilla into pieces and use some of the pieces to cover the corners of the casserole.
- Repeat the meat, cheese, and tortilla layers.
- Finish with the remaining taco meat mixture and the remaining shredded cheese.
- Bake for 20–25 minutes, or until the casserole is hot and the cheese is fully melted.
- Sprinkle with chopped fresh parsley or cilantro and serve warm.
Notes
- Keep the taco mixture slightly saucy before assembling so the tortillas do not become dry during baking.
- Homemade riced cauliflower can be used instead of the steam-bag cauliflower, but it should be cooked before adding it to the skillet.
- For a stricter grain-free or keto approach, a suitable homemade low-carb tortilla may be substituted.
- The original notes recommend assembling the casserole ahead and refrigerating it, covered, for no more than 2 days before baking.
- The casserole can be frozen for up to 3 months and should be thawed overnight in the refrigerator before baking.
- Suggested toppings include salsa, jalapeños, sour cream, diced tomatoes, shredded lettuce, green onions, cilantro, and avocado.
Nutrition Facts
- Calories: 417kcal
- Fat: 30g
- Carbohydrates: 11g
- Fiber: 6g
- Protein: 26g