This Everyday Sandwich Bread made with Fresh Milled Flour is an Easy, beginner friendly Recipe. I will walk you through each step of the way, and I have video instructions HERE where you can watch me make this exact bread along with some other goodies too! I believe that homemade is usually better, especially when it comes to bread. Also, I want to show you how to make a delightful everyday sandwich bread using fresh milled flour. By using this wholesome and nutritious ingredient, you’ll not only enhance the flavor and texture but also add an extra dose of nutrition to your sandwiches. So, Let’s get started!
Can I Make This Fresh Milled Flour Sandwich Bread With Sourdough Instead Of Yeast?
Yes! This recipe can be made with sourdough rather than yeast. I have that recipe and method on my website as well! HERE is my Sourdough Sandwich Bread Recipe made with freshly milled flour.
Making Sandwich Bread With Fresh Milled Flour
Making Sandwich bread with fresh milled flour is no easy feat when you are first learning. Even if you are an experienced baker for many many years, fresh milled flour is a whole new ballgame! When I started baking with fresh milled flour, years ago, everything I knew about baking with white flour went out the window. All the tricks I thought I knew didn’t work. And all those “Golden Rules” I always abided by just ended in failure after failure. So, this made me even more determined to figure out why and what I needed to do to change this into success! I was determined that I could create light fluffy loafs just like the sandwich bread I bought at the store…..But better!
Learning To Master Fresh Milled Flour Sandwich Bread
When I was learning, there was very little information out there only a couple resources, and slim to no recipes written specifically for freshly milled flour. I had to figure out, all by trial and error how to master this! Once I began working with fresh milled flour more and more, I began to learn and grow. This is when I decided I should try to teach others everything I have learned. My inspiration bloomed into a Youtube channel, and Blog. I never thought I would do either of those (I am quite introverted), but the calling was just there I guess. So, I just needed to step out of my comfort zone!
I teach tips and tricks in most all of my videos, and blog posts. I am continuing to write new recipes often to share with the world. All of them with exclusively fresh milled flour. I have a passion to spread the word, and teach people how much healthier whole grains are. Also, I want to help people learn what they are putting in their foods, and in turn putting in their bodies.
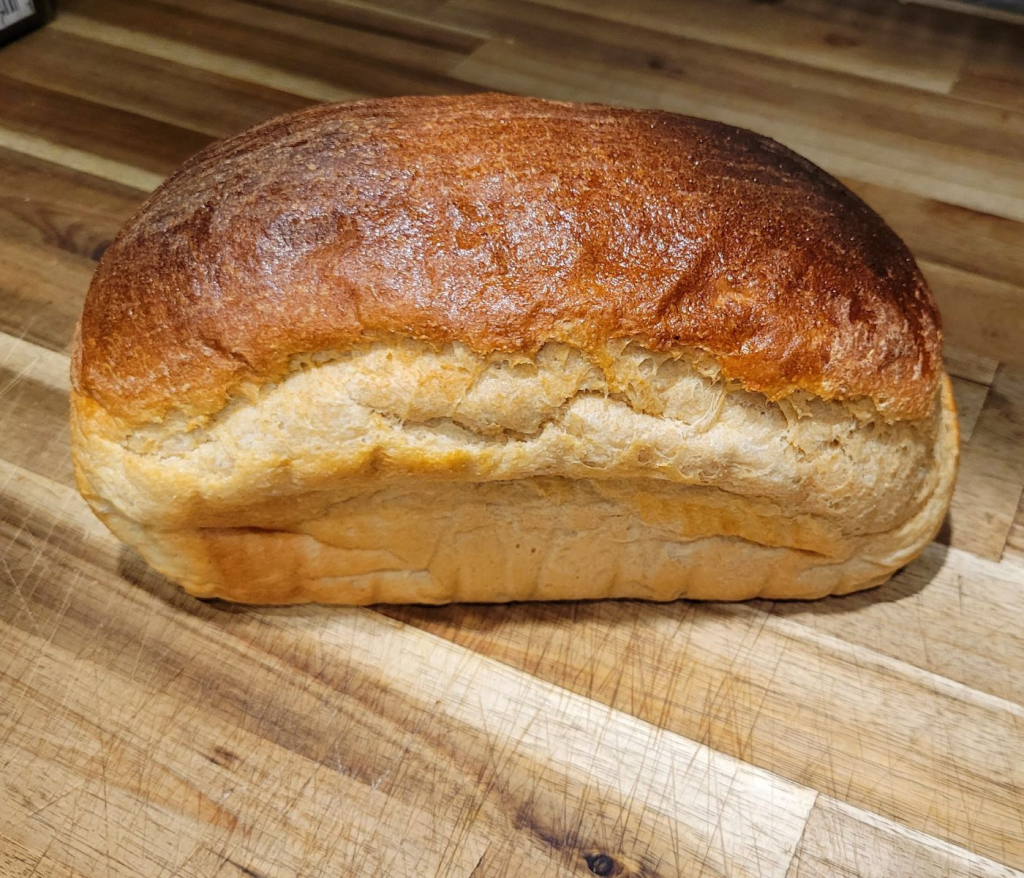
Elevate your bread loaf with a simple brush of enriching egg wash. This will elevate the browning, and give it a shiny appearance.
Switching From White Flour To Fresh Milled Flour
Firstly, don’t start out changing everything at once! It will be difficult to do, as there is a learning curve, and tastebud curve as well. (If that is even such a thing.) Take it slow, and work on mastering one bread, and one or two other non bread recipes. Once you master one bread recipe you will start to develop a feel for how it should look, feel, and move. (*hint I will post a couple great starter bread recipes (other than this one, of course) at the end of this post.) I know it is exciting to try all sorts of new recipes, but often times when people do this, they just think they don’t like fresh milled flour, and stop using it. I promise it will all come to you in due time.
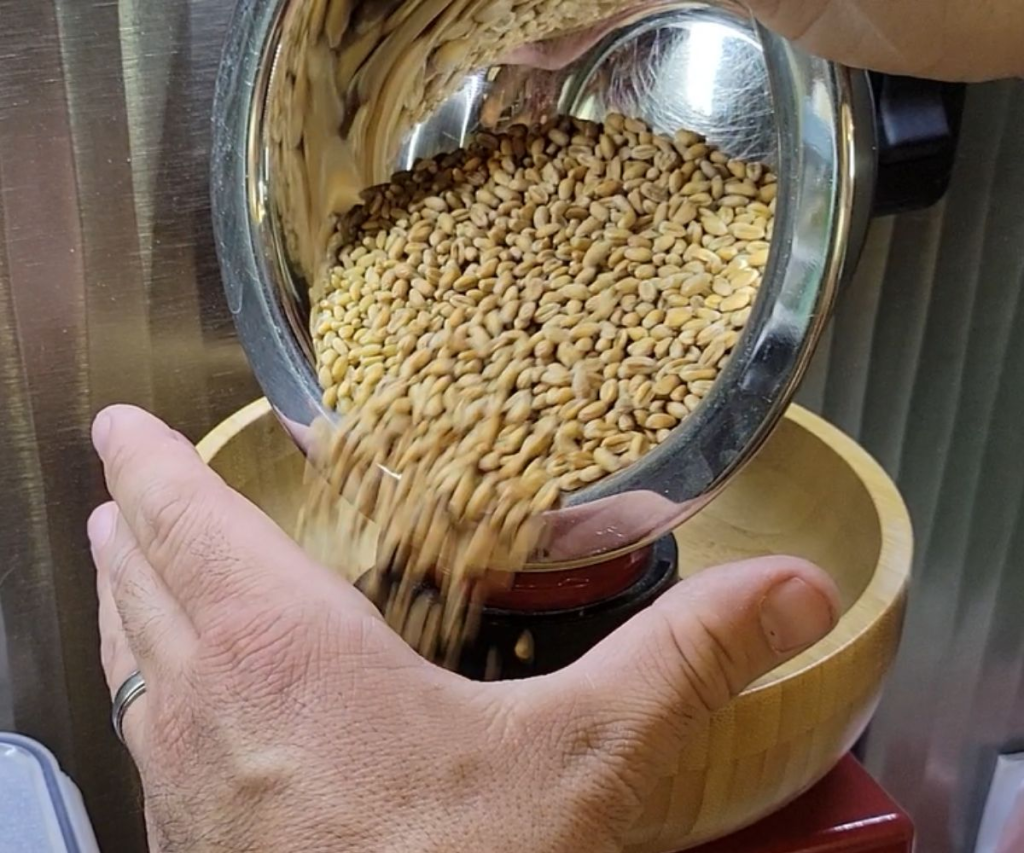
Embrace the joy and satisfaction of milling wheat berries—a delightful journey that rewards you twofold. Not only do you revel in the experience, but you also savor the delicious fruits of your labor. Explore the art of milling and relish the delightful products that emerge, bringing fulfillment to both body and soul.
What Pan Size Should I Use?
My recipes call for the smaller 4×8 bread loaf pans, because I have a tiny oven! lol. Even the 4.5×8.5 pans are a bit larger, crazy how just that half inch each way can make such a difference! So, if you only have the larger pans, I recommend to x1.5 my recipes if you are looking for a large high rise loaf of bread. The large pans will definitely still work, the loafs will just be a bit smaller.
Ingredients To Make This Fresh Milled Flour Sandwich Bread
Bread Pan Size 4×8
- 4 cups Fresh Milled Flour 485g (I like to mill 405g hard white, and 80g Kamut)
- 3/4 cup water 180g
- 3/4 cup milk 180g
- 3 TBSP Butter 42g
- 3 TBSP Sugar or Honey 63g
- 1&1/2 tsp salt
- 1 egg 50g
- 2 tsp instant yeast
Medium Bread Pan Size 4.5×8.5
- 6 cups Fresh Milled Flour 728g (I like to mill 608g hard white, and 120g Kamut)
- 1&1/8 cup water 270g
- 1&1/8 cup milk 270g
- 4&1/2 TBSP Butter 63g
- 4&1/2 TBSP Sugar or Honey 94g
- 2&1/4 tsp salt
- 2 eggs 100g
- 3 tsp instant yeast
Large Bread Pan Size 5×9
- 8 cups Fresh Milled Flour 970g (I like to mill 810g hard white, and 160g Kamut)
- 1&1/2 cup water 360g
- 1&1/2 cup milk 360g
- 6 TBSP Butter 84g
- 6 TBSP Sugar or Honey 126g
- 3 tsp salt
- 2 egg 100g
- 4 tsp instant yeast
Instructions To Make Fresh Milled Flour Sandwich Bread
- Firstly, Mill the flour
- Then, to a microwave safe bowl add water, milk, and butter and microwave until the butter is melted completely.
- Add water/milk/butter mixture to stand mixer bowl, then add sugar, egg, and salt. Mix to combine.
- Then, add flour to the stand mixer, and start to mix until all the dry flour is gone.
- Cover and let it sit at room temperature for at least 15 minutes, up to 2 hours to allow the fresh milled flour to absorb the liquid.
- Then, add the instant yeast. Start to mix the yeast in until combined.
- Start the kneading process. This could take 25 minutes with fresh milled flour, or less. This varies greatly, so the best way to check if the dough is done being kneaded, is to check for a window pane test.
- Once a successful window pane test is done, then, cover the dough and let it rise until doubled. This will typically take 1 to 2 hours.
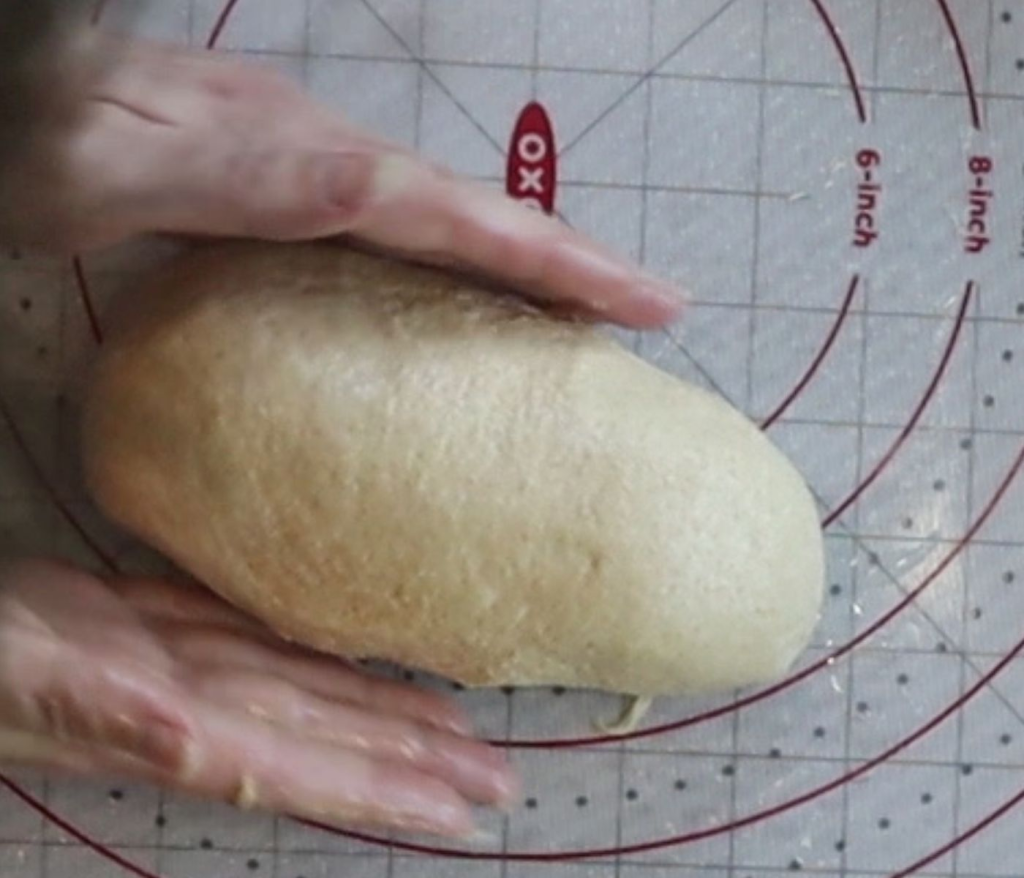
I am shaping the bread loaf to achieve optimal surface tension.
Shaping The Loaf
There are so many ways to shape a loaf of bread, but the most important thing is to make sure you have good surface tension.
- After the dough has doubled in size, then, divide the dough in half if you are making 2 one pound loaves. Press each piece flat, then roll up to shape.
- I like to use some oil on my hands and work surface to help with the wetter stickier dough.
- Place in a parchment paper lined 4×8 bread pan, and cover for about 40 minutes until puffy looking.
- Preheat oven to 350*F towards the end of this second rise time.
- Bake for 30 to 40 minutes until the internal temperature reaches 190*F.
- Take bread out of the oven, and out of the bread tins right away, and place them on a wire cooling rack.
- Let cool for at least one hour before slicing.
- Slice to desired thickness, and enjoy!
Using Hard White Wheat & Kamut To Make Sandwich Bread
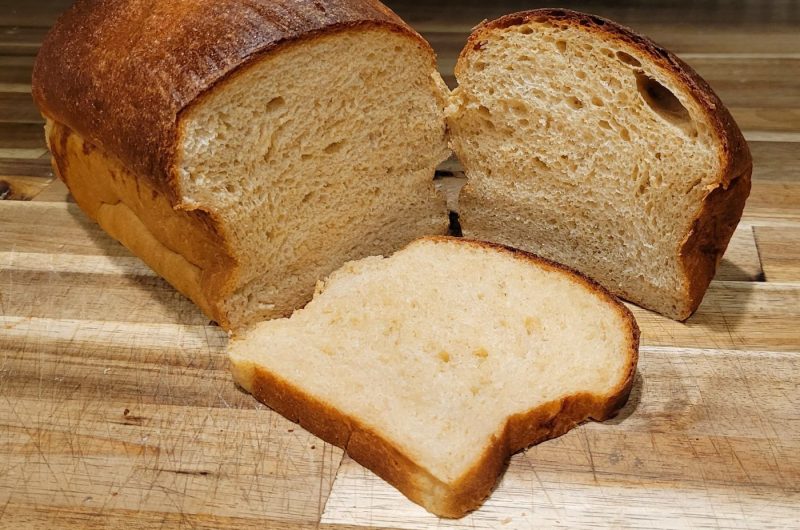
Indulge in the epitome of homemade perfection with this captivating slice of bread. Expertly crafted using a combination of predominantly hard white wheat and a delightful hint of Kamut, this sandwich bread is a true marvel made with freshly milled flour. Prepare to experience the utmost softness and irresistibly squishy texture, all while savoring the wholesome essence of 100% whole grains. Brace yourself for a taste sensation that redefines what homemade bread can truly be.
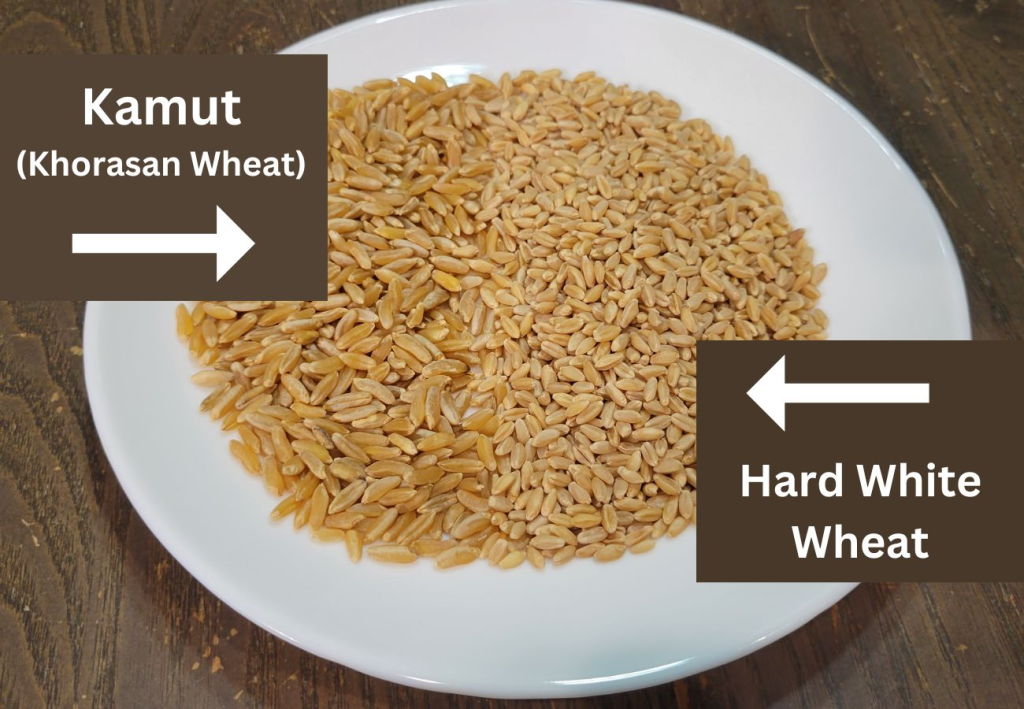
I figured I should show you the beauty that the golden Kamut brings to this bread!
Enjoy That Bread!
With this simple and rewarding recipe, you can easily create a delicious everyday sandwich bread using freshly milled flour. The wholesome goodness and aromatic flavors will elevate your sandwiches to a whole new level. Say goodbye to store-bought bread and enjoy the satisfaction of homemade goodness. Happy baking!
How To Store Fresh Milled Flour Sandwich Bread
To store these fresh milled flour sandwich bread loafs, keep in an airtight container, or bag. Then, keep on the counter for 2-3 days. For longer storage, place in a freezer safe bag and freeze for up to 4 months. (Make sure the loaf has cooled completely before freezing, best results to freeze the same day as it is baked.) To thaw, sit on the counter, and let come to room temperature.
Fresh Milled Flour Everyday Sandwich Bread
This Everyday Sandwich Bread made with Fresh Milled Flour is an Easy, beginner friendly Recipe. I believe that homemade is usually better, especially when it comes to bread. I want to show you how to make a delightful everyday sandwich bread using fresh milled flour. By using this wholesome and nutritious ingredient, you’ll not only enhance the flavor and texture but also add an extra dose of nutrition to your sandwiches. So, Let’s get started!
Prep Time 40 minutes
Cook Time 25 minutes
rise time 2 hours
Total Time 3 hours 5 minutes
Equipment
- 2 4×8 bread pans
Ingredients
For Smaller Bread Pans 4×8
- 4 cups Fresh Milled Flour 485g I like to mill 405g hard white, and 80g Kamut
- 3/4 cup water 180g
- 3/4 cup milk 180g
- 3 TBSP Butter 42g
- 3 TBSP Sugar or Honey 63g
- 1&1/2 tsp salt
- 1 egg 50g
- 2 tsp instant yeast
For Medium Bread Pan Size 4.5 x 8.5
- 6 cups Fresh Milled Flour 728g I like to mill 608g hard white, and 120g Kamut
- 1&1/8 cup water 270g
- 1&1/8 cup milk 270g
- 4&1/2 TBSP Butter 63g
- 4&1/2 TBSP Sugar or Honey 94g
- 2&1/4 tsp salt
- 2 eggs 100g
- 3 tsp instant yeast
For Large Bread Pan Size 5 x 9
- 8 cups Fresh Milled Flour 970g I like to mill 810g hard white, and 160g Kamut
- 1&1/2 cup water 360g
- 1&1/2 cup milk 360g
- 6 TBSP Butter 84g
- 6 TBSP Sugar or Honey 126g
- 3 tsp salt
- 2 egg 100g
- 4 tsp instant yeast
Instructions
- Firstly, Mill the flour
- Then, to a microwave safe bowl add water, milk, and butter and microwave until the butter is melted completely.
- Add water/milk/butter mixture to stand mixer bowl, then add sugar, egg, and salt. Mix to combine.
- Then, add flour to the stand mixer, and start to mix until all the dry flour is gone.
- Cover and let it sit at room temperature for at least 15 minutes, up to 2 hours to allow the fresh milled flour to absorb the liquid.
- Then, add the instant yeast. Start to mix the yeast in until combined.
- Start the kneading process. This could take 25 minutes with fresh milled flour, or less. This varies greatly, so the best way to check if the dough is done being kneaded, is to check for a window pane test.
- Once a successful window pane test is done, then, cover the dough and let it rise until doubled. This will typically take 1 to 2 hours.
- After the dough has doubled in size, then, divide the dough in half. I like to use some oil on my hands and work surface to help with the wetter stickier dough.
- Press each piece flat, then roll up to shape. Make sure there is some surface tension.
- Place in a parchment paper lined 4×8 bread pan, and cover for about 40-50 minutes until puffy looking.
- Preheat oven to 350*F towards the end of this second rise time.
- Bake for 30 to 40 minutes until the internal temperature reaches 190*F.
- Take bread out of the oven, and out of the bread tins right away, and place them on a wire cooling rack.
- Let cool for at least one hour before slicing.
- Slice to desired thickness, and enjoy!
Notes
*Bread Pan Size Tips: My recipes call for the smaller 4×8 bread loaf pans, because I have a tiny oven! lol. Even the 4.5×8.5 pans are a bit larger, crazy how just that half inch each way can make such a difference! So, if you only have the larger pans, I recommend to x1.5 my recipes if you are looking for a large high rise loaf of bread. The large pans will definitely still work, the loafs will just be a bit smaller.
*How To Store The Bread: To store these fresh milled flour sandwich bread loafs, keep in an airtight container, or bag. Then, keep on the counter for 2-3 days. For longer storage, place in a freezer safe bag and freeze for up to 4 months. (Make sure the loaf has cooled completely before freezing, best results to freeze the same day as it is baked.) To thaw, sit on the counter, and let come to room temperature.
