Craving ice cream but want to keep it high in protein and low in guilt? This Ninja Creami protein ice cream recipe is the ultimate treat smooth, creamy, and packed with over 30 grams of protein per serving!
What Makes This Recipe Special?
Unlike traditional protein ice cream recipes that rely on pudding mix, we use a secret ingredient: unflavored collagen powder. This boosts protein content while maintaining a luxuriously smooth and creamy texture.
Step-by-Step Guide to the Creamiest Protein Ice Cream
Step 1: Prepare Your Ice Cream Base
To ensure the best consistency:
Freeze the mixture uncovered – This prevents the dreaded “doming” effect.
Let it sit at room temperature for at least 10 minutes before churning.
Run the outside of the container under warm water for 30 seconds to loosen icy edges.
Step 2: Churn to Perfection
Use the full light ice cream cycle for the best texture.
Scrape down the sides after the first cycle to avoid any icy bits.
Step 3: Add Mix-Ins for Extra Flavor
Want an extra punch? Add mix-ins like chocolate chips, nuts, or fruit during the mix-in cycle for bursts of flavor!
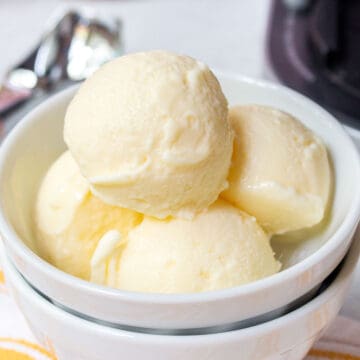
Ninja Creami Vanilla Protein Ice Cream A Delicious and Healthy Treat
4
servings10
minutes12
hours273
kcal12
hours10
minutesIndulge in a smooth, protein-packed ice cream made effortlessly in the Ninja Creami! With over 30 grams of protein per serving, this treat is both delicious and nutritious.
Ingredients
Protein Ice Cream Base
1¾ cup (14 oz) whole milk or 2% milk
2 scoops (64g) vanilla protein powder
1 scoop (10g) unflavored collagen (for extra protein & creaminess)
2-3 tbsp (40g) pure maple syrup, honey, or granulated monk fruit sweetener (optional but recommended)
Mix-In Options (Choose Your Favorites!)
2-3 tbsp protein cookie dough
2-3 tbsp gluten-free cookie dough
2-3 tbsp creamy peanut butter
1 fresh banana or fruit of choice
2 tbsp mini chocolate chips
Directions
- Step 1: Prepare the Base
In a 24 oz Ninja Creami container, combine all protein ice cream base ingredients and mix well.
Freeze for at least 12 hours, ensuring the mixture is flat and even on top. - Step 2: Churn to Perfection
Before churning, let the container sit at room temperature for 10 minutes. Flatten any bulges.
Run the outside of the container under hot water for 30 seconds, then dry completely.
Place the container in the Ninja Creami Deluxe machine and run a full-light ice cream cycle. - Step 3: Add Mix-Ins & Serve
Scrape down the sides and add your desired mix-ins.
Run a full mix-in cycle to blend flavors evenly.
Serve immediately and enjoy the creamy, protein-packed goodness
Notes
- Leftovers? Store in the freezer and re-spin using the top light ice cream cycle before serving
- Customize it! Mix and match different flavors for endless variations.
