Why I Love This Recipe
What’s not to love about these protein-packed cheesecake jars? Not only are they deliciously smooth and creamy, but they also offer a healthy twist on a classic dessert. The combination of Greek yogurt, cottage cheese, and protein powder boosts the protein content without sacrificing flavor. Plus, the individual jars make them perfect for portion control, and the addition of sweet cherry topping brings a lovely fruitiness that pairs perfectly with the cheesecake’s rich flavor. I love how versatile this recipe is, with simple substitutions to suit dietary preferences, and how easy it is to prepare ahead of time!
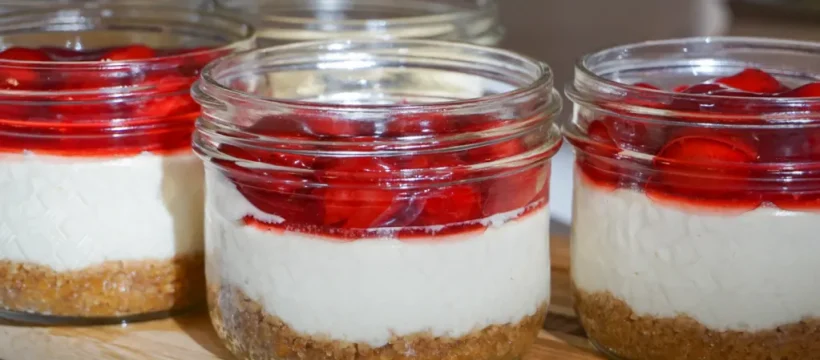
Protein-Packed Cheesecake Jars
Prep Time: 20 minutes
Cook Time: 1 hour 30 minutes
Cooling Time: 4 hours
Total Time: 5 hours 50 minutes
Servings: 5 jars
Calories per Jar: 350 kcal
Ingredients
For the Crust:
- 57 grams butter, melted (approximately ¼ cup)
- 150 grams graham cracker crumbs (approximately 1¼ cup)
- 1 teaspoon sugar
- ½ teaspoon salt
For the Filling:
- 226 grams cream cheese (one 8 oz brick), room temperature
- 50 grams sugar (¼ cup)
- 120 grams Greek yogurt (½ cup), room temperature
- 120 grams cottage cheese (½ cup), room temperature
- 30 grams protein powder (1 scoop), vanilla flavor
- 1 egg, room temperature
- 1 teaspoon vanilla extract
For the Topping:
- ½ can E.D. Smith Cherry Pie Filling (or your choice of fruit topping)
Instructions
Step 1: Preheat the Oven
Preheat your oven to 300°F (150°C).
Step 2: Prepare the Crust
- In a bowl, combine the melted butter, graham cracker crumbs, sugar, and salt. Mix well until everything is evenly incorporated.
- Spoon 2 scoops of the crust mixture into each jar (about 5 jars total) and press down lightly to form a compact crust.
- Pre-bake the jars in the preheated oven for 10 minutes while preparing the filling.
Step 3: Prepare the Filling
- In a blender, combine the cream cheese, sugar, Greek yogurt, cottage cheese, protein powder, egg, and vanilla extract. Make sure your ingredients are all at room temperature to avoid any lumps.
- Blend until smooth and well combined, scraping down the sides as necessary.
- Divide the filling evenly among the 5 jars, filling each jar about 80% full.
Step 4: Bake the Cheesecakes
- Place the jars into a baking pan. Carefully add water to the pan to create a water bath, which will help the cheesecakes bake evenly and prevent cracking.
- Bake the jars for 30 minutes, then turn off the oven and leave the jars inside for an additional 1 hour.
- After 1 hour, remove the jars from the oven and allow them to cool at room temperature for a bit before refrigerating.
Step 5: Chill and Set
- Refrigerate the jars for about 4 hours to allow the cheesecakes to fully set. The cheesecake filling will firm up as it cools.
Step 6: Top with Cherries
- Once the cheesecakes have set, spoon a generous amount of E.D. Smith Cherry Pie Filling (or your preferred topping) on top of each cheesecake jar.
- Serve and enjoy!
Notes and Tips
- Macronutrient Breakdown (Per Jar):
- Calories: 350 kcal
- Protein: 16 grams
- Carbohydrates: 23 grams
- Storage:
- Shelf Life: These protein cheesecake jars are best enjoyed within 3-4 days of preparation. For maximum freshness, eat them as soon as possible!
- Refrigeration: Store the jars in the refrigerator to keep them fresh. The cold helps maintain the creamy texture and prevents them from becoming too soft.
- Room Temperature Enjoyment: To enjoy the cheesecakes at their creamiest, allow them to sit at room temperature for 30 minutes before eating. This enhances the flavor and smoothness.
- Substitutions:
- Sweeteners: If you prefer a low-sugar version, try using honey, maple syrup, or a sugar substitute of your choice. Adjust the amount according to taste.
- Crust Alternatives: If you’re looking for a gluten-free option, substitute the graham cracker crumbs with crushed gluten-free cookies or almond meal.
- Fruit Toppings: If you’re not a fan of cherries, you can top your cheesecake jars with fresh berries, peaches, or even a spoonful of jam for a different flavor profile.
- Protein Powder Substitution:
- If you don’t want to use protein powder, you can omit it entirely. Without the protein powder, the protein content per jar will drop to approximately 9 grams.
- Jar Size Considerations:
- For the best results, use wide-mouth jars with a 250 mL (8 oz) capacity. This ensures the portions are evenly distributed, and the baking time is consistent across all jars.
- Smaller Jars: If using smaller jars (like 125 mL), the recipe will yield more jars, but the baking time should be reduced accordingly.
- Larger Jars: For larger jars, you may need to extend the baking time slightly. Always monitor the cheesecakes and adjust the time as needed.
FAQs
- Can I make these in advance?
Absolutely! These protein cheesecake jars are perfect for making ahead. They can be stored in the refrigerator for up to 3-4 days. The flavor and texture will continue to develop as they chill. - What if I don’t have Greek yogurt or cottage cheese?
You can substitute the Greek yogurt and cottage cheese with more cream cheese or sour cream if you prefer. However, this might slightly alter the texture and protein content. - Can I freeze these cheesecakes?
While it’s not recommended to freeze the filled jars, you can freeze the crust and filling separately and then assemble and bake fresh when you’re ready to enjoy them. Freezing may change the texture of the topping, so it’s best to add the cherry pie filling right before serving. - Can I use another protein powder flavor?
Yes! Feel free to experiment with different protein powder flavors, such as chocolate or strawberry. Just keep in mind that the flavor profile of the cheesecake will change depending on your choice.
Enjoy this easy-to-make, protein-packed dessert that’s perfect for any occasion. Whether you’re looking for a post-workout snack or a sweet treat that’s still healthy, these cheesecake jars are sure to hit the spot
