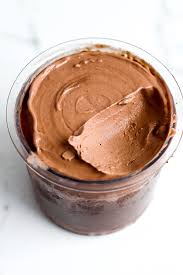
Craving a rich, chocolatey dessert that also boosts your protein intake? This Chocolate Protein Ice Cream offers the best of both worlds. It’s an indulgent, creamy treat that’s not only healthy but also made with wholesome ingredients. Perfect for a post-workout snack or a refreshing dessert, this recipe is easy to make with the Ninja Creami. You can enjoy a satisfying chocolate flavor without the guilt!
What You’ll Need for Chocolate Protein Ice Cream
Before we dive into the step-by-step process, let’s go over the ingredients you’ll need:
- 1 Chocolate Premier Protein Shake: This shake provides a protein-packed, chocolate-flavored base that contributes creaminess and richness to your ice cream.
- 1 Tablespoon Unsweetened Cocoa Powder: Adds an extra punch of chocolate flavor while keeping the recipe healthy.
- 1 Tablespoon Chocolate Sugar-Free Pudding Mix: This adds thickness and a smooth texture to your ice cream without the extra sugar.
- ½ Cup Whole Milk: The whole milk gives the ice cream a rich, creamy texture. If you’re lactose intolerant or prefer a dairy-free version, substitute it with oat milk or any plant-based milk.
Now that you know what you’ll need, let’s get started!
How to Make Chocolate Protein Ice Cream
Step 1: Prepare the Ice Cream Base
Start by grabbing a medium-sized mixing bowl. Pour the Chocolate Premier Protein Shake into the bowl, which will act as the protein-rich base for your ice cream. The shake gives the ice cream a deliciously smooth and creamy texture while providing a good dose of protein.
Next, whisk in the unsweetened cocoa powder. This ingredient intensifies the chocolate flavor, making your ice cream more decadent. Cocoa powder is also full of antioxidants, adding an extra health boost.
Once the cocoa powder is fully blended, add the chocolate sugar-free pudding mix. You don’t need to prepare the pudding in advance—just add the dry mix straight into the bowl. The pudding mix helps thicken the ice cream and contributes to its silky smooth texture.
Finally, pour in the whole milk (or a dairy-free milk alternative if desired). This adds the necessary creaminess and helps bring all the ingredients together to create a smooth base.
Whisk everything together until well combined and smooth.
Step 2: Freeze the Mixture
With your ice cream base ready, it’s time to freeze it. Pour the mixture into a Ninja Creami pint, making sure not to overfill it beyond the max fill line. This will prevent any overflow when freezing and spinning.
Seal the pint with the lid and place it in your freezer on a flat surface. Allow the mixture to freeze for a minimum of 24 hours. This step is crucial as it helps form a solid block of ice cream that the Ninja Creami will transform into a creamy treat.
Step 3: Spin Your Mixture into Ice Cream
Once your mixture has frozen completely, it’s time to turn it into ice cream! Take the pint out of the freezer and get your Ninja Creami machine ready.
First, remove the lid from the pint. Place the pint into the Ninja Creami outer bowl and secure it with the lid. Twist the bowl to the right to lock it into place.
Now, select the “Lite Ice Cream” setting on your Ninja Creami. The machine will begin spinning the frozen mixture into smooth, creamy ice cream. Since this recipe is low in sugar, the “Lite Ice Cream” setting is ideal for achieving the perfect texture.
Step 4: Fine-Tune the Creaminess
If your ice cream comes out crumbly after the first spin, don’t worry! This can happen when the mixture freezes too solidly. To fix this, add 1 tablespoon of milk (any kind will do) and press the “Re-Spin” button. Continue the re-spin process until the ice cream reaches your desired consistency.
The texture should be smooth and soft, but still firm enough to hold its shape, just like traditional ice cream. Feel free to re-spin multiple times if needed until it’s perfect.
Step 5: Serving and Storing
Once your ice cream is ready, scoop it into a bowl and enjoy! It’s delicious straight from the machine. If you have leftovers, store the ice cream in the freezer.
To enjoy the leftovers, simply let the pint sit on the counter for 10-15 minutes to soften, or microwave it for 10-15 seconds. This will make it easier to scoop and enjoy without needing to re-spin.
Tips for the Best Chocolate Protein Ice Cream
Here are a few tips and tricks to help you make the perfect batch every time:
- Try Different Protein Shakes: Premier Protein is a great choice, but other protein shakes like Ripple or Orgain can be used. Just note that the texture and flavor may vary slightly depending on the brand.
- Mix In Extra Ingredients: If you want to add some texture and flavor, try folding in chocolate chips, nuts, or a swirl of peanut butter after the first spin. Just add them before re-spinning.
- Freezing Leftovers: Leftover ice cream will firm up in the freezer. To enjoy it, let it sit out for a few minutes, or microwave it briefly. You can also re-spin it if you prefer the freshly spun texture.
- Choose Your Milk: If you prefer a richer, creamier base, use whole milk. For a dairy-free version, oat milk works well and adds a touch of sweetness. Almond milk or soy milk are also good alternatives.
By following these tips, you can easily customize your chocolate protein ice cream to suit your preferences while keeping it healthy and protein-packed.
Frequently Asked Questions
Can I use a different protein shake?
Yes! While Premier Protein is ideal, other protein shakes like Ripple or Orgain will work as well. Just keep in mind the flavor and texture might change slightly.
What if the ice cream is too hard or crumbly?
If your ice cream is too hard or crumbly, simply add a tablespoon of milk and re-spin it. This should help soften and smooth it out.
Do I need to re-spin leftovers?
It’s not necessary to re-spin leftovers. Let the ice cream sit out for a few minutes or microwave it for 10-15 seconds to soften it before serving.
What kind of pudding mix should I use?
We recommend using Jell-O chocolate sugar-free pudding mix. The dry mix is added directly into the base without the need for preparation.
With these simple steps, you can create a delicious and healthy chocolate protein ice cream that satisfies your sweet tooth while giving you a protein boost!
Simple Chocolate Protein Ice Cream
1
servings5
minutes24
hours24
hours5
minutesIngredients
1 Chocolate Premier Protein Shake
1 tablespoon Unsweetened Cocoa Powder
1 tablespoon Chocolate Sugar-Free Pudding Mix
½ cup Whole Milk (or Oat Milk for a dairy-free option)
Directions
- In a bowl, whisk together the Chocolate Premier Protein Shake, unsweetened cocoa powder, chocolate sugar-free pudding mix, and whole milk (or oat milk). Mix until smooth and fully combined.
- Pour the mixture into a Ninja Creami pint and seal it with the lid.
- Place the pint in the freezer for 24 hours to freeze completely.
- Once frozen, remove the pint from the freezer and place it in the Ninja Creami machine. Use the “Lite Ice Cream” setting to spin the mixture into ice cream.
- If the ice cream comes out crumbly, add 1 tablespoon of milk and press the “Re-Spin” button until the texture is smooth and creamy.
- Serve and enjoy your delicious, creamy chocolate protein ice cream
