Why I Love This Recipe
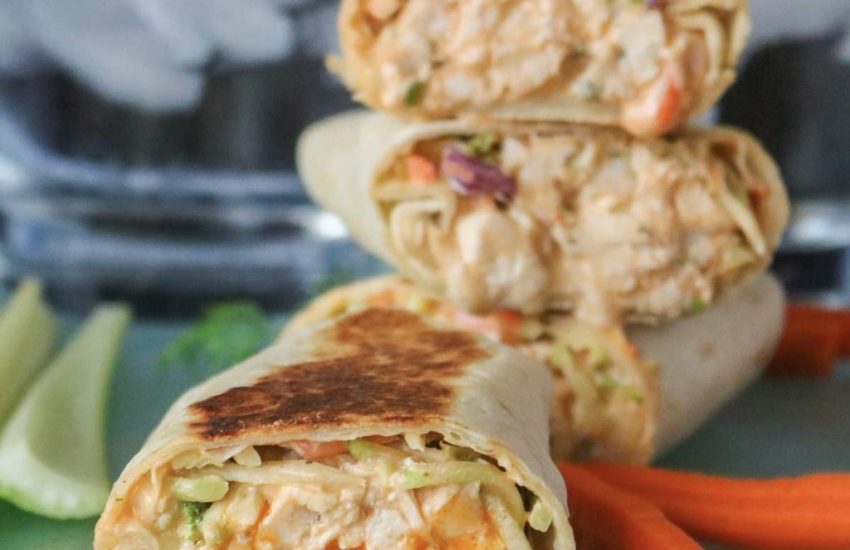
If you’re a fan of spicy, savory, and cheesy wraps with minimal effort, this Buffalo Chicken Wrap is the perfect recipe for you! It’s quick to make, customizable, and packed with flavor, all while being light and satisfying. Whether you’re using rotisserie chicken, canned chicken, or cooking it fresh, this wrap comes together in no time. The buffalo sauce adds that perfect tangy kick, and the addition of Greek yogurt makes it creamy without the extra calories. Plus, it’s versatile enough for any time of day—whether as a quick lunch, snack, or even a game day appetizer. Enjoy the crispy, golden texture when using the air fryer, skillet, or panini press for the ultimate indulgence!
Buffalo Chicken Wrap
Yields: 1 wrap
Prep Time: 5 minutes
Cook Time: 5–6 minutes (depending on cooking method)
Total Time: 10 minutes
Calories: Approximately 250-300 kcal per wrap (depending on specific ingredients used)
Ingredients
Buffalo Chicken Filling:
- 1/3 cup cooked boneless, skinless shredded chicken breast (rotisserie chicken, canned chicken, or fresh cooked)
- 1–2 tablespoons non-fat plain Greek yogurt
- 1/2 tablespoon Franks buffalo sauce (or more for extra heat)
- 1/8 teaspoon dried parsley
- Pinch of dried dill weed (optional)
Wrap Ingredients:
- 1 (8-inch) tortilla – I love Ole Xtreme Wellness High Fiber Flour Tortilla Wraps or Tumaro wraps
- 1 Laughing Cow cheese wedge (any flavor) or 1 tablespoon light cream cheese
- Green onions, thinly sliced or chopped
- 2 slices of Hormel precooked bacon, crumbled or 2 tablespoons Hormel real bacon bits
- 2 tablespoons reduced-fat or fat-free cheddar cheese (or regular for a richer taste)
Instructions
1. Prepare the Buffalo Chicken Filling:
In a small mixing bowl, combine the shredded chicken, Greek yogurt, buffalo sauce, dried parsley, and dill weed. Start with 1 tablespoon of yogurt and adjust to your preferred level of creaminess. Mix well until the chicken is coated evenly in the sauce mixture.
2. Assemble the Wrap:
- Cut a slit up the middle of the tortilla to the edge to help with folding.
- In the bottom left corner, spread the buffalo chicken mixture.
- In the top left corner, add the crumbled bacon.
- Spread the Laughing Cow cheese wedge or light cream cheese in the top right corner, then sprinkle the green onions on top.
- In the bottom right corner, add the shredded cheddar cheese.
3. Fold the Wrap:
- Start by folding the buffalo chicken portion over the crumbled bacon.
- Then, fold the wrap clockwise, first over the Laughing Cow cheese and green onions, and finally over the shredded cheese to secure all the filling.
Cooking Methods
Skillet Directions:
- Spray a skillet with non-stick cooking spray.
- Place the wrap in the skillet and cook for 2-3 minutes per side, flipping carefully until each side is golden and crispy.
Air Fryer Cooking Directions:
- Preheat the air fryer to 400°F (200°C).
- Place the wrap in the air fryer basket and cook for 4-6 minutes.
- Flip the wrap halfway through to ensure it cooks evenly.
- Once done, it should be crispy on the outside and warm on the inside.
Panini Press Directions:
- Spray the panini press with non-stick cooking spray.
- Place the wrap in the press and cook until crispy and golden. This should take about 4-6 minutes depending on your press.
Serving Suggestions
Serve your warm, crispy Buffalo Chicken Wrap with extra buffalo sauce for dipping, alongside jalapeños for a spicy kick, or a side of skinny ranch dressing for a creamy contrast. For an extra crunch, add some shredded lettuce.
Tips & Tricks
- Adjust the heat level: If you love a spicier wrap, feel free to add more buffalo sauce or even sprinkle in some chili flakes. If you prefer a milder version, use less buffalo sauce or opt for a mild buffalo sauce.
- Customize your filling: You can add other veggies like shredded carrots, cucumber slices, or tomatoes to add more flavor and texture to your wrap.
- Warm tortillas: If you’re using a flour tortilla that is a bit stiff, warm it in a dry skillet or microwave for a few seconds to make it more pliable and easier to fold.
- Extra crispy: For an even crispier wrap, you can brush the outside of the tortilla with a little olive oil before cooking.
Notes
- Tortilla options: You can swap the tortilla for a gluten-free variety or a low-carb wrap if you’re following specific dietary preferences.
- Chicken options: Using rotisserie chicken is a great shortcut, but feel free to use canned chicken (drained), or cook your own chicken breast for a fresher flavor.
- Dairy options: If you’re lactose intolerant, use dairy-free cream cheese and a dairy-free cheese alternative.
Storage
Buffalo chicken wraps are best served fresh, but if you have leftovers, you can store them in the fridge for up to 2 days. To reheat, pop them in the air fryer for 2-3 minutes to crisp them back up. For best results, avoid storing the wraps once they’ve been cooked in the air fryer, as they may lose their crispy texture when refrigerated.
FAQs
1. Can I use cooked chicken breast instead of rotisserie or canned chicken?
Yes! Feel free to use freshly cooked chicken breast. Simply shred it and follow the recipe as usual.
2. Can I freeze these wraps?
Yes, you can freeze the assembled (uncooked) wraps. Wrap each one tightly in plastic wrap and store them in the freezer for up to 2 months. When you’re ready to eat, air fry from frozen, adding a few extra minutes to the cooking time.
3. What if I don’t have a skillet or air fryer?
No worries! You can easily use a panini press or cook these wraps in the oven. If using the oven, bake at 400°F for about 10 minutes, flipping halfway through.
Enjoy this Buffalo Chicken Wrap as a quick meal, snack, or appetizer. It’s full of flavor, easy to make, and customizable to fit your taste. Whether you’re cooking for one or making a batch for the whole family, this recipe is sure to be a hit
- Makes 1 wrap
- 5 Points® per serving
