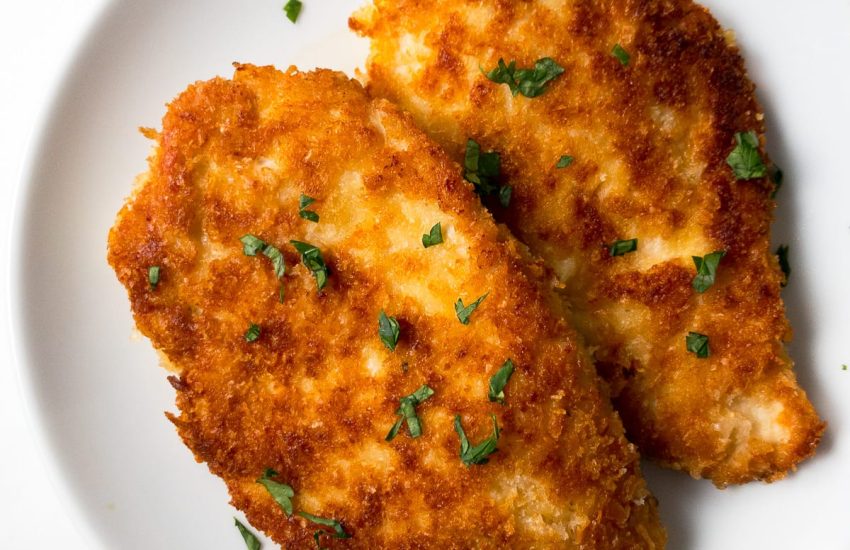
These crispy, golden brown chicken cutlets are perfect for any meal, and they’re easy to prepare!
Why I Love This Recipe
I absolutely love this recipe because it’s incredibly simple but delivers amazing flavor and texture. The chicken is juicy and tender on the inside, while the parmesan and panko coating crisps up beautifully for a satisfying crunch. It’s a versatile dish that pairs well with everything from a fresh salad to pasta, and it’s the perfect meal to make when you want something flavorful yet easy to prepare. Plus, it’s the kind of recipe that makes everyone at the dinner table ask for seconds!
Crispy Parmesan Chicken Cutlets
Prep Time: 15 minutes
Cook Time: 16 minutes
Ready In: 31 minutes
Servings: 4 servings
Ingredients
- 2 boneless, skinless chicken breasts (10 oz each)
- ½ cup (2.5 oz) all-purpose flour
- 2 teaspoons Italian seasoning
- 1 ½ teaspoons garlic powder
- 2 large eggs
- 1 cup (2.5 oz) panko bread crumbs
- ½ cup (1.5 oz) finely shredded parmesan cheese
- Salt and freshly ground black pepper, to taste
- 6 tablespoons olive oil
- Lemon wedges, for serving (optional)
- Fresh parsley, for garnish (optional)
Instructions
Step 1: Prepare the Chicken
- Butterfly and split each chicken breast into two portions, making a total of four pieces.
- Place the chicken between two sheets of plastic wrap and pound each piece to an even ¼-inch thickness using the flat side of a meat mallet. This ensures the chicken cooks evenly and results in a tender cutlet.
Step 2: Set Up the Dredging Stations
- In a shallow dish, combine the flour, Italian seasoning, and garlic powder. Whisk to blend.
- In a second shallow dish, whisk the eggs until fully blended.
- In a third shallow dish, toss together the panko bread crumbs and parmesan cheese.
Step 3: Coat the Chicken
- Season each chicken cutlet generously with salt and freshly ground black pepper on both sides.
- Dredge each chicken piece in the flour mixture, ensuring both sides are coated. Then, dip it into the egg mixture, allowing any excess egg to drip off.
- Next, coat the chicken in the panko-parmesan mixture, pressing down lightly to ensure the coating sticks well.
Step 4: Pan-Fry the Chicken
- Heat ¼ cup of olive oil in a 12-inch heavy non-stick skillet over medium heat.
- Once the oil is hot, add two chicken breasts to the skillet. Cook until the bottom is golden brown, about 4 minutes. If the chicken is browning too quickly, reduce the heat slightly.
- Flip the chicken and continue cooking for another 4 minutes, or until the center reaches 165°F on an instant-read thermometer.
- Transfer the cooked chicken to a plate lined with paper towels to drain.
- Add the remaining 2 tablespoons of olive oil to the skillet and repeat the process with the remaining two chicken breasts.
Step 5: Serve
- Serve the chicken warm with lemon wedges on the side. Garnish with fresh parsley if desired for an extra burst of color and flavor.
Tips and Tricks
- Pounding the Chicken: Make sure to pound the chicken evenly to ensure it cooks uniformly. You can also use a rolling pin or a heavy pan if you don’t have a meat mallet.
- Dredging Order: It’s important to follow the correct dredging order—flour, egg, and then panko—to get that perfect crispy coating.
- Oil Temperature: If the oil is too hot, the crust will burn before the chicken is fully cooked. If it’s too cold, the chicken won’t crisp up. Medium heat is usually the sweet spot.
- Make it Extra Crispy: For an even crispier chicken, add a second layer of panko breadcrumbs after dipping the chicken in the egg wash.
- Don’t Overcrowd the Pan: If your skillet is too crowded, the chicken will steam rather than fry, preventing it from becoming crispy. Cook in batches if necessary.
Notes
- Serving Suggestions: These crispy chicken cutlets are perfect served with mashed potatoes, a side salad, or pasta. You can also serve them on sandwiches or wraps for a quick lunch or dinner.
- Gluten-Free Option: To make this recipe gluten-free, you can use a gluten-free flour blend and gluten-free panko breadcrumbs.
- Extra Flavor: Add a pinch of red pepper flakes to the panko mixture if you like a bit of spice, or toss in some fresh herbs like rosemary or thyme for an aromatic twist.
- Cheese Alternatives: If you don’t have parmesan on hand, you can use Pecorino Romano or Grana Padano for a similar flavor.
Storage
- Storage: Leftover chicken cutlets can be stored in an airtight container in the refrigerator for up to 3 days.
- Reheating: To maintain the crispy texture, reheat the chicken in a skillet over medium heat or in the oven at 350°F for about 10-15 minutes. Avoid microwaving, as it can make the crust soggy.
- Freezing: You can freeze the cooked chicken cutlets for up to 2 months. To freeze, place the chicken on a baking sheet in a single layer, freeze until solid, and then transfer to a freezer bag. To reheat, bake at 375°F for about 15-20 minutes until heated through.
FAQs
- Can I use boneless skinless chicken thighs instead of breasts?
Yes, boneless skinless chicken thighs work well for this recipe. They will be a bit juicier and slightly more tender than chicken breasts. Adjust the cooking time slightly as thighs may take a little longer to cook through. - What can I use instead of panko bread crumbs?
If you don’t have panko, you can use regular breadcrumbs, though they won’t be as crunchy. For a gluten-free version, try using crushed rice cereal or gluten-free breadcrumbs. - Can I make this ahead of time?
You can prepare and coat the chicken cutlets ahead of time and store them in the fridge for a few hours before frying. Just make sure to cover them tightly with plastic wrap to prevent them from drying out. - Can I bake the chicken instead of frying it?
Yes, you can bake the coated chicken on a baking sheet at 400°F for 20-25 minutes, flipping halfway through. However, baking won’t give you the same golden, crispy exterior as pan-frying.
Enjoy this crispy, flavorful Parmesan Chicken Cutlets that are as satisfying as they are easy to make!
